What I learned making the same recipe nine times in a row

26263490

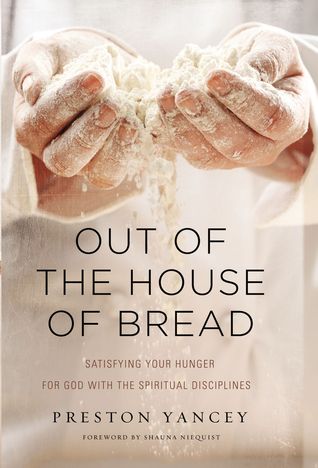
Now that I’ve written a more literary review of Out of the House of Bread, the latest book by Preston Yancey, you all might be curious to learn why it inspired me to bake the same bread recipe nine (9!!!!) times.

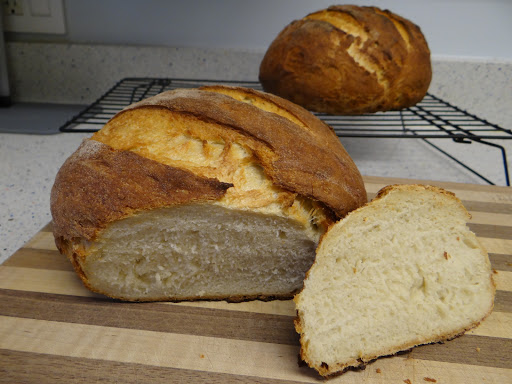
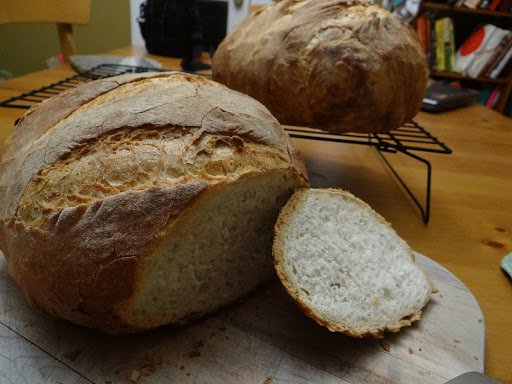
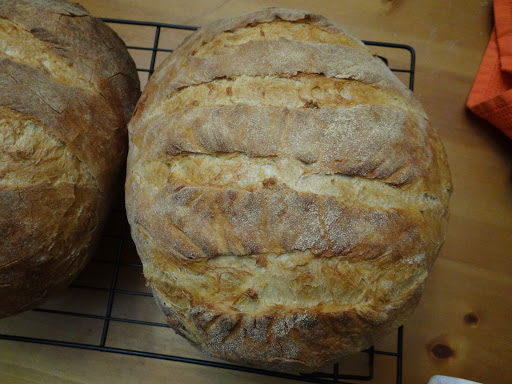
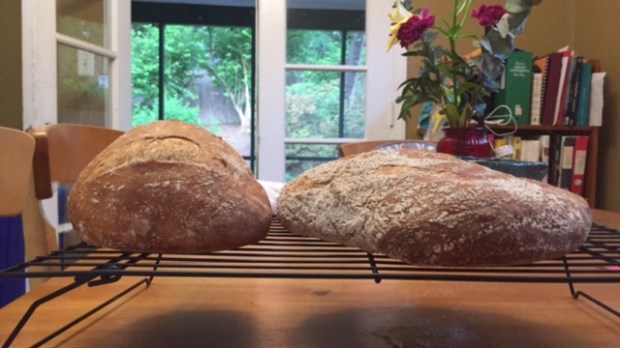
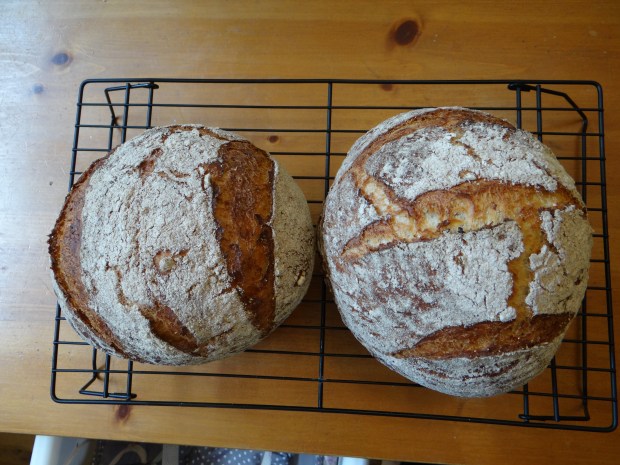
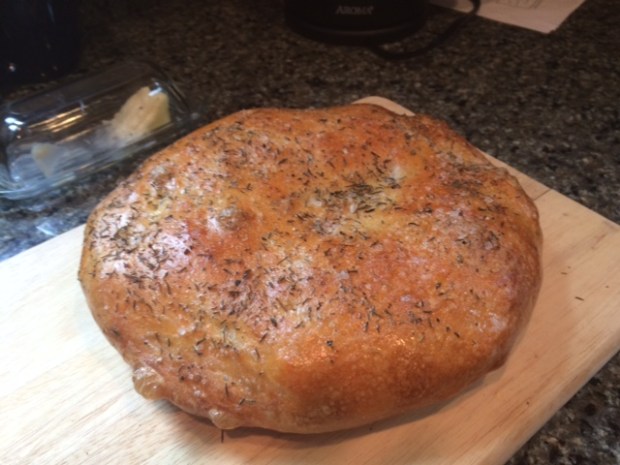
Preston Yancey’s White Bread attempt #1

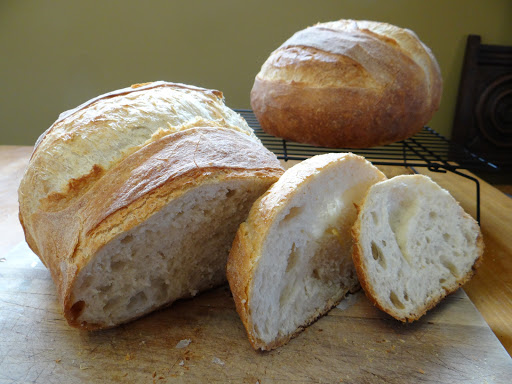
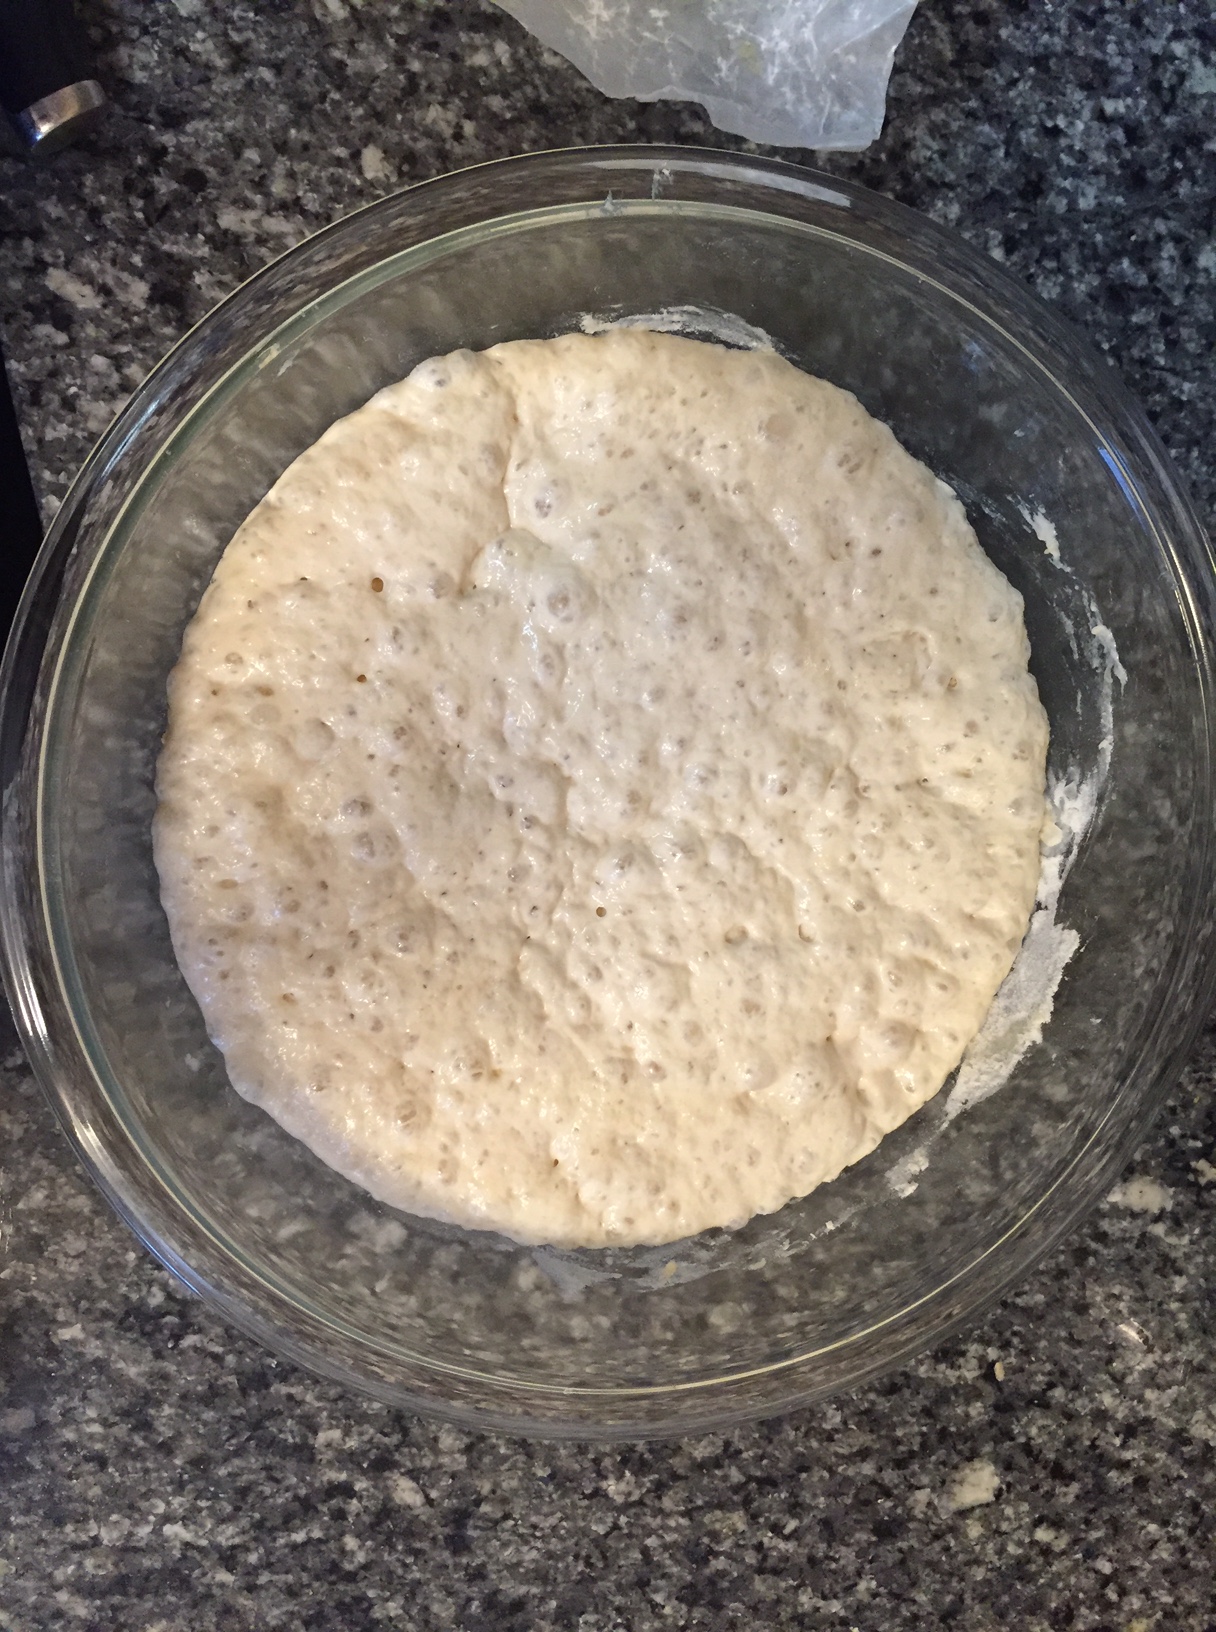
Preston Yancey’s White Bread attempt #2

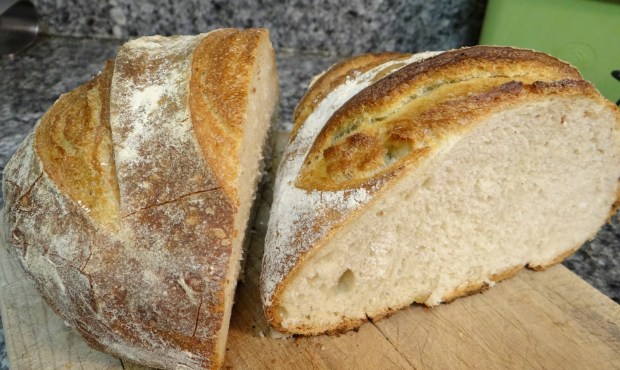
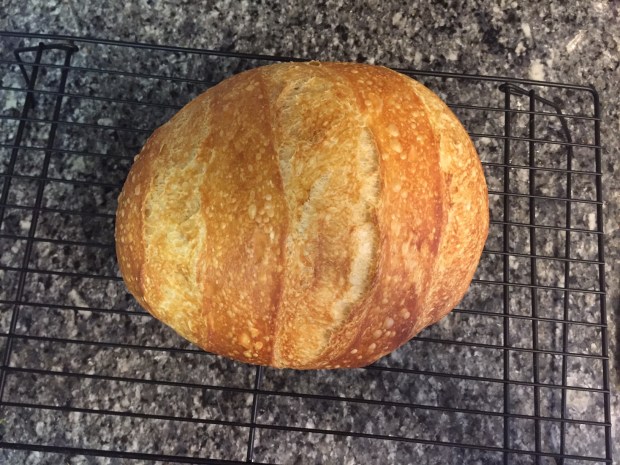
Preston Yancey’s White Bread attempt #3

Preston Yancey’s White Bread attempt #4

Preston Yancey’s White Bread attempt #5

Preston Yancey’s White Bread attempt #6

Preston Yancey’s White Bread attempt #7

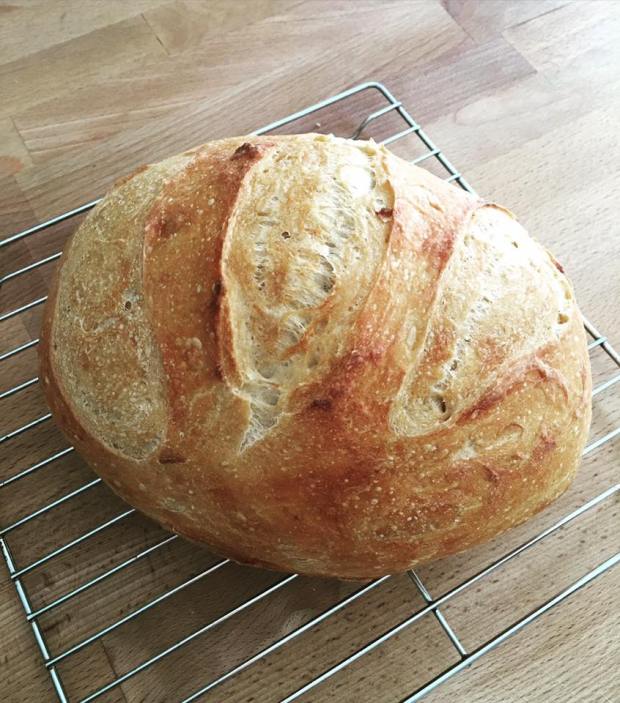
Preston Yancey’s White Bread attempt #8

Preston Yancey’s White Bread attempt #9

Obviously, I like a challenge.  I bake bread most weeks; I would say I average a loaf a week at least.  I feel pretty confident as a baker.

But as good as any baker can be, I also know that you can’t really get a feel for a recipe if you only make it once.   I think this can only happen successfully if you bake a recipe a minimum of three times.  You have to get inside the head of the recipe writer, and get a sense of what they want out of the recipe. What are their preferences? What tricks and techniques have they picked up over the years?  Why in the heck was that step included?  Those are the things I think about when I read a recipe for the first time.  Baking a new recipe is almost like dating, in a way.

DSC03100

When I made Preston’s recipe for the first time, I was really confused.  He has written the recipe for someone who has absolutely no familiarity with breadbaking, which was challenging for me to read because I wanted to skip over the parts about how to mix, how to shape, how to bake, etc.  This led me into trouble because I would forget steps that turned out to be important.  I’ve been baking bread for ten years and I’m a little ornery; justify to me why a step is necessary and I’ll do it.  If it seems like a waste of time, I won’t.

DSC03101

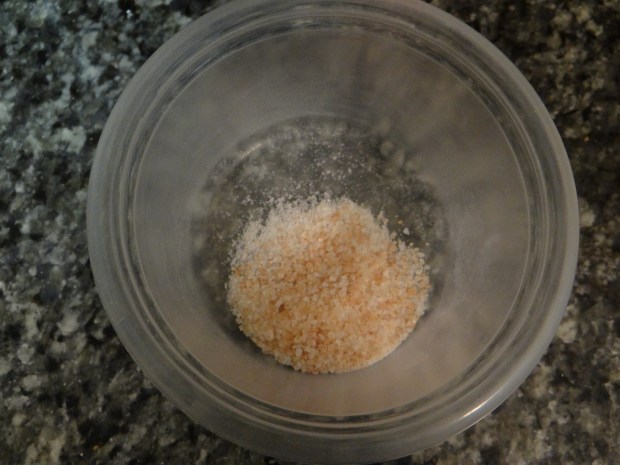
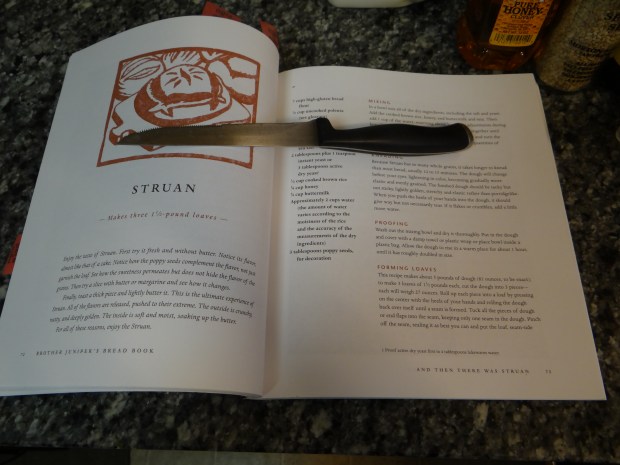
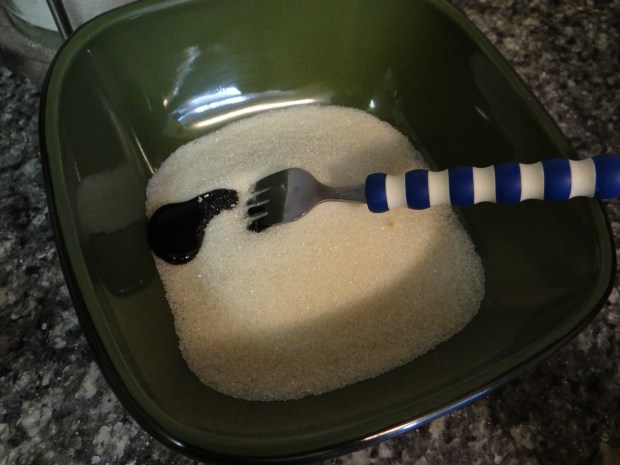
grinding the salt was a waste of time

As you can see, it took me practically the entire nine attempts to reach a brokered peace with Preston’s methods.  It was not a surrender – I brought several improvements to the table once I had a sense of the recipe.  But this isn’t about me.  It’s about the recipe, and there were several techniques that I used for the first time because of Preston’s book.

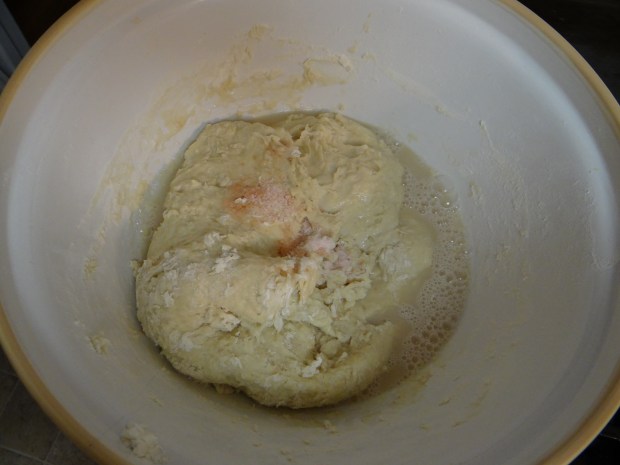
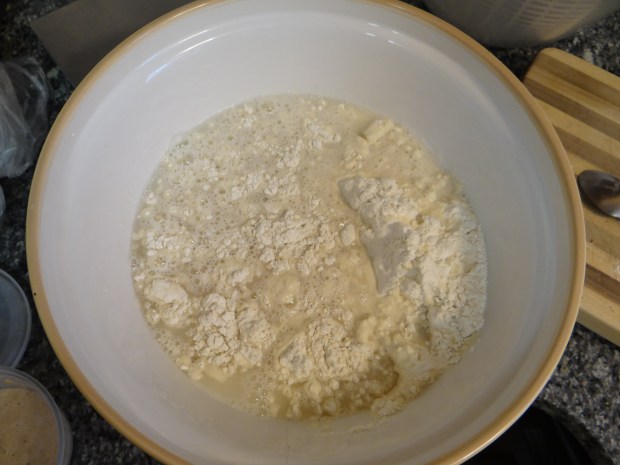
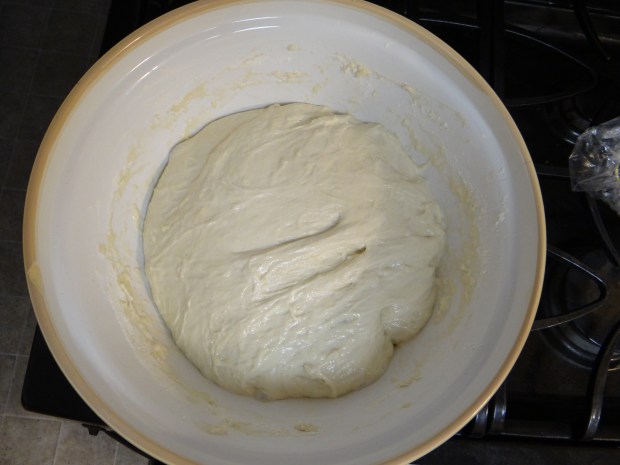
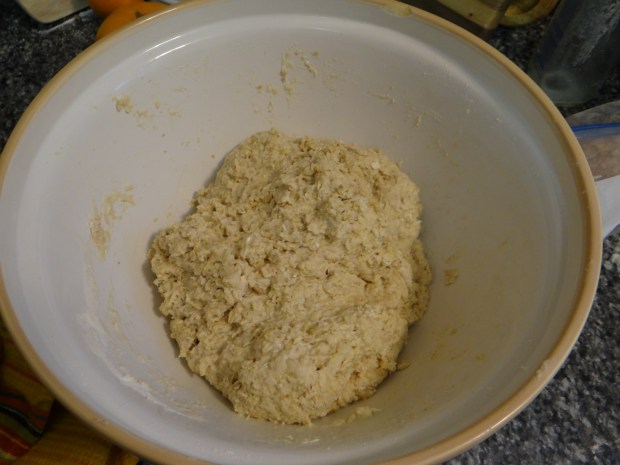
  1. Pure autolyse.  Preston’s recipe calls for you to mix the flour and water together first and letting the dough rest for 15 minutes to get a good start on the gluten formation before adding the salt and yeast.  This is a pretty typical step for bakers to use, but in doing it, I found that I liked adding the salt and yeast at the same time as I mixed up the dough.  By separating the salt and yeast, I found it was easier for me to forget to add them at the end of the 15 minute autolyse period.DSC02841
  2. Something else I discovered by separating out the autolyse step was that water temperature matters, even if you aren’t worried about killing the yeast.  The first time I made this recipe, I misread it and added scalding hot water to the flour.  This was a big mistake, as I later learned.  The overheated water caused the carbohydrate molecule chains in the flour to absorb water and burst, causing the dough to take on an unpleasant gummy texture and very little gluten formation.  Now I know that water temperature is important for making sure the dough comes together properly.DSC03102
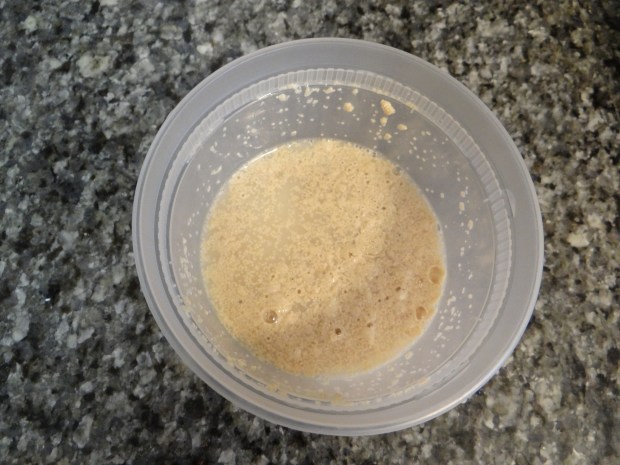
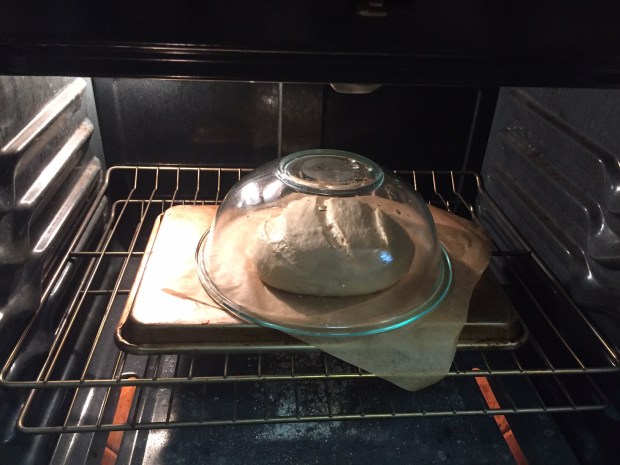
  3. Using a tupperware to proof yeast.  Preston proofs his yeast, water, honey and sugar in a small lidded tupperware so that he can shake it up before adding it to the dough.  I used it sometimes, but I didn’t find it particularly necessary.IMG_4664
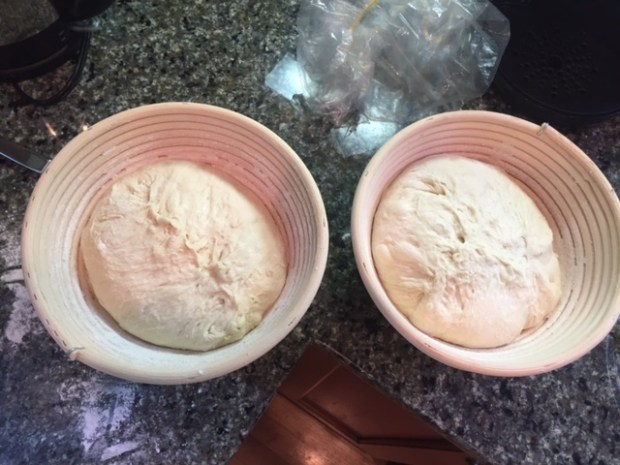
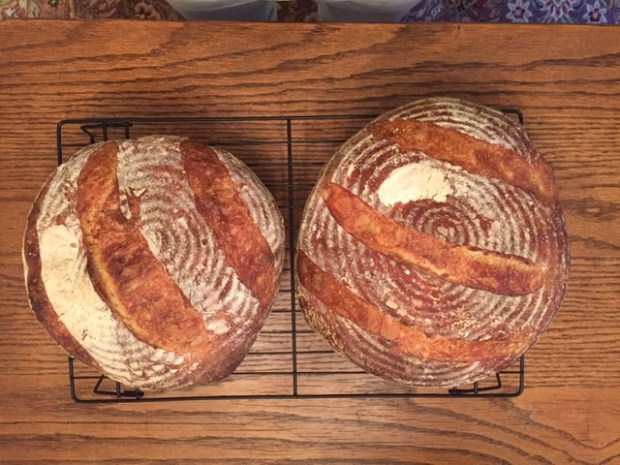
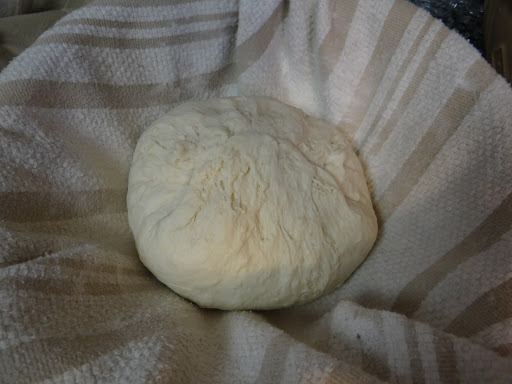
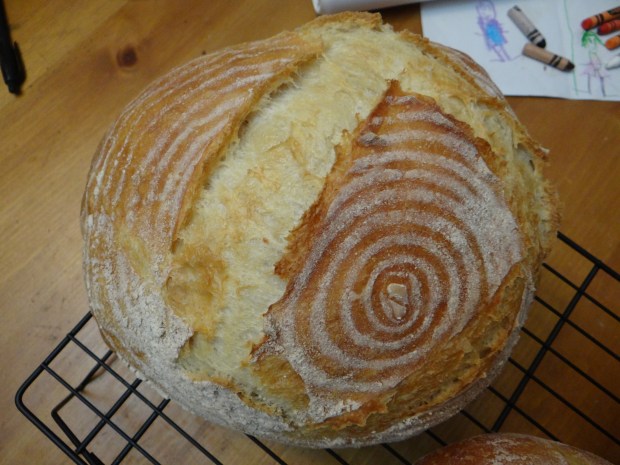
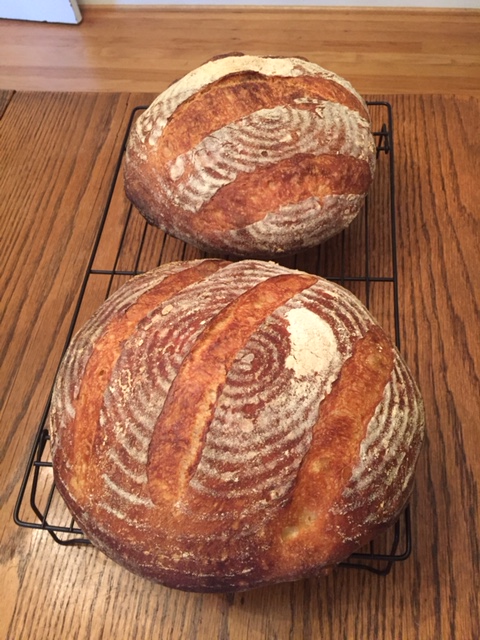
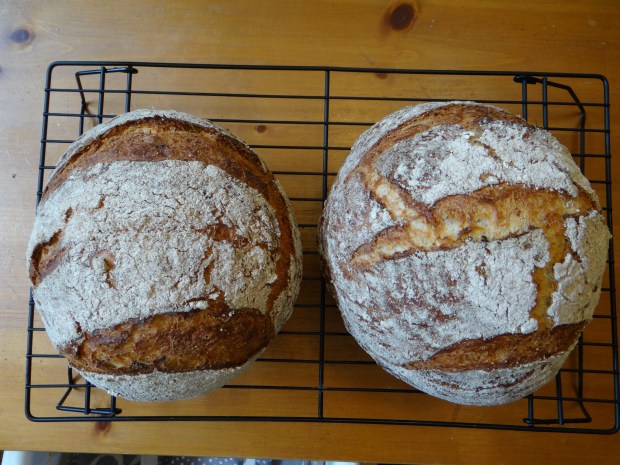
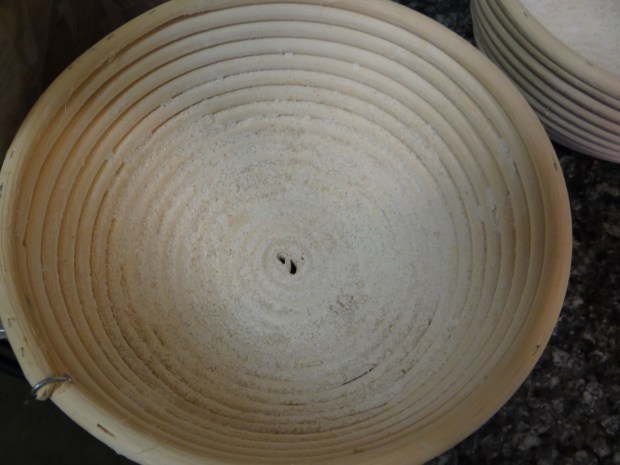
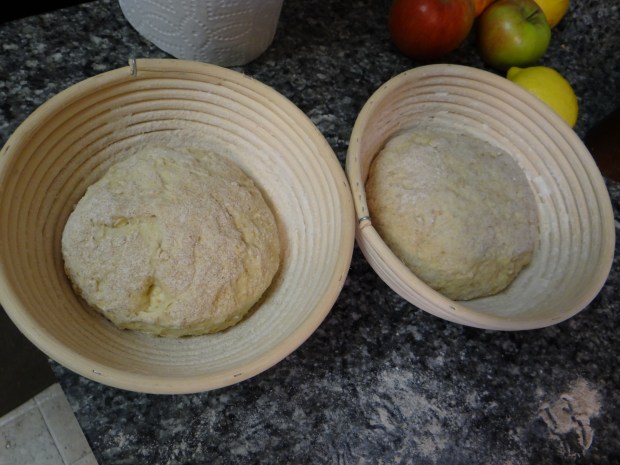
  4. Using a couche and why a skin on your dough is a good thing.  I will admit, I didn’t understand the appeal of couches or bannetons until testing out Preston’s method.  And after one try, I was hooked enough to order two 1-lb bannetons.  Not only do bannetons keep high-hydration doughs from flattening during the 2nd rise (which they do if left free-standing), but letting them rise in the refrigerator supplies just enough dryness to create a skin on the surface of the dough.  I had always thought a skin would interfere with oven spring – after all, by hardening your dough’s crust prematurely, it couldn’t possibly expand as much, right?  Well, yes, that is true – but by hardening the crust a little before scoring the dough, you are further emphasizing the point of the scoring – creating weak points in the dough where it can explode out in a controlled way.  I found the light skin on the surface of the dough before baking made my scoring patterns look sharper and the oven spring look more intentional.  By using the bannetons, my breads kept their rounded shape better and had a cool spiral pattern on top too.  This technique was a total win.IMG_4666
  5. One last technique before I talk about baking is less a technique and more a tool recommendation from Preston.  It’s a tool that I already knew about, but because of Preston’s use of bannetons I’ve brought back more regularly: scoring with a razor blade instead of a serrated knife.  Since becoming a mom, I’ve switched from using razor blades to using a serrated knife to score my dough.  Having razor blades around in the kitchen made me nervous.  But with bannetons or couches, the dough goes directly from the couche, top side down, into the oven so it is right-side up again.  Then you have to score it quickly while it’s sitting in a screaming hot dutch oven in a screaming hot oven.  No sweat, right?  I found getting the right angle to score directly across the dough with a serrated knife with enough force to be a challenge.  So I decided to go back to razor blades.  The first time I did this, I accidentally dropped the blade into the dutch oven, ha ha!  But since then I haven’t had any problems, and I’ve been careful to store the blades up high in a cabinet when I’m not using them.  With the razor blades, I can make deep cuts quickly and gently, and the blade doesn’t get stuck in the dough like serrated knife blades do if you even hesitate a little bit.dsc02670


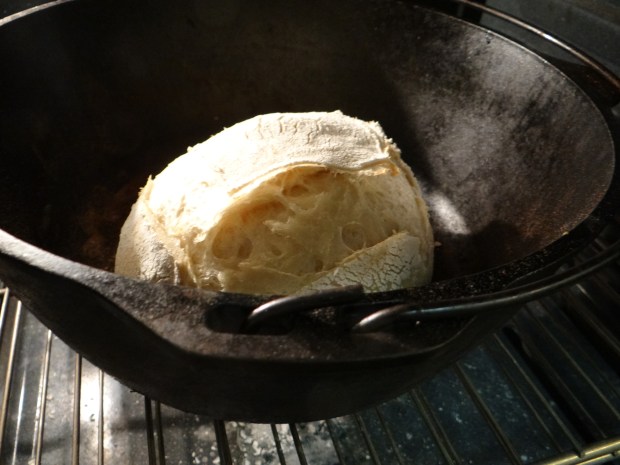
6. Finally, I really came to like Preston’s three-step baking procedure.  It’s in three sets of fifteen minutes: First, bake the dough for 15 minutes with the dutch oven lid on at 500 degrees F.  Then, bump the temperature down to 375 degrees F for 15 minutes.  Then remove the lid and bake the final 15 minutes.  I don’t know why I like it, but I do.  DSC03110DSC03111

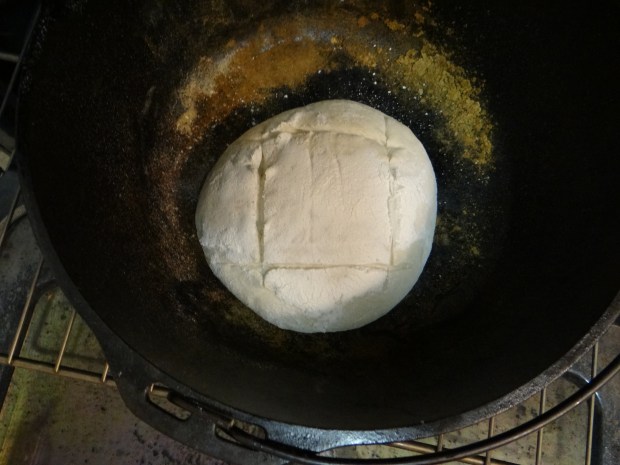
Even though I didn’t end up baking it exactly as Preston specified each time, I think the lessons I learned by baking his bread nine times were more universal: there’s more than one way to make a loaf of bread, there’s always more to learn, and it’s good to slow down sometimes and really focus on one thing, experience it and letting it be your singular focus for a while.  You might see all the posts I write and think I make new breads every time, but I have my handful of favorites that I make time after time, and I find joy in the familiar each time.

DSC03181FullSizeRender

I hope you enjoyed this post, and that it inspires you to take on a challenge in your life.  It doesn’t have to be baking, but let me know in the comments if it is!


Preston Yancey, Out of the House of Bread

26263490

(this review appeared in an earlier form on goodreads)

I was hoping to write a review about Out of the House of Bread primarily as a bread book, but I realized that that would be unfair.  It’s not in the same genre as Peter Reinhart or other bakers.  Preston Yancey is a faith leader and author by trade, not a baker.  The structure of his book is more like Shauna Niequist’s Bread and Wine.  The food is not the key factor, but a tool for developing a deeper understanding of faith concepts.

DSC02883

Nevertheless, I enjoyed his perspective on baking and took on the challenge of trying a new recipe and making it nine times. He justifies the challenge because “the practice of baking is, to me, less about following the recipe than it is learning the feel of dough and how the humidity of a room changes the texture of the crust.”

DSC03194

When he wasn’t going too over-the-top with his purple prose (I cringed when he likened a closed dutch oven to a tomb), it was actually quite lovely and sometimes funny. I liked how he wove life and bread-baking together in his metaphors, describing the spiritual and the physical in the same terms.

We’ll “bake it out.”

“the mess is holy and so is the uncluttered.”

DSC03195

“[The rise] is the process that remains a marvel to me, how bread slowly becomes itself with so little of our input when it comes down to it.  We have only brought in means to make, but it is the dough itself that comes alive and into its own.”

“the less communal our lives become, the less communal our expectations of our religious environments.”

“tradition forms us, feeds us, gives us roots.”

“I am comforted that there is always but one more thing to discover and to know about God.  I’m comforted there are so many ways and kinds of knowing.  Some knowing is in the hands touching bread, some in the work of the field, some in the pages of words penned millennia before.  God seeks a plurality of experience with us, a shifting kaleidoscope of encounter.”

DSC03196

“Dividing dough is an unceremonious task with no room for pretense.  There’s a good deal of flopping and flipping and hoping for the best.  Let that be a welcome to you instead of a hindrance. Accept the necessary task of disorder.  There will be flour on your kitchen floor.  There will be sticky dough clinging to your elbow.  These things are unavoidable but these things are also the stuff of real, ordinary, miraculous life.”

DSC03028

Where his writing really shines is in the Feasting chapter when he talks about the death of his grandfather and baking a pie that he then shares with his father. The chapter is so restrained and yet it conveys so much. I wish there were more vignettes like that. The structure reminded me of Rachel Held Evans’s new book, but she really expanded and pushed the idea of the various sacraments that framed her narrative.

DSC03197

In the end, his book left me wanting more while simultaneously wanting less.  I hesitate to say this but I wish he had waited a year and published this book, to see what he might add. In the time since Out of the House of Bread was published, he has become an ordained minister, and he and his wife welcomed their first child.  I would’ve been interested to see how those experiences changed him and/or his baking.  It seems like he chose not to share his really deep life experiences in this book, where they would have strengthened it.  That is his choice, but his stories become repetitive by the end.  He spends too much time hammering home the metaphor of the Scottish path, and not enough time exploring his own spiritual journey.  This could be because he already recounted it in Tables in the Wilderness, but I haven’t read that.

IMG_4666

In the end, I gave this book three stars.  Together, the baking side and the spiritual side of the narrative come together to create something stronger than either part alone.

DSC02867

So that is my literary review of Out of the House of Bread.  I also plan on publishing my baker’s review, with more details about what I learned baking the same bread nine times.  Stay tuned.

A journal of making Preston Yancey’s white bread, week by week

By journal, I really mean a stream of consciousness account of bread baking, with pictures.  If you want to check out the recipe, it’s here: http://thebreadmaiden.blogspot.com/2016/02/preston-yanceys-white-bread-attempt-1.html

Week 1

I wish he had used weight rather than volume measurements!

Dang, eight cups of flour is a lot.  This better be worth it.

Hot water during autolyse?  Weird… ok.  (five minutes later) Oh no, he said “use warm, not hot water”!  Oops.  This thing is really gummy.  Will I be able to save it?  I would hate to waste eight cups of flour.

Maybe I can stretch and fold this thing into service.

Oh no, I forgot the salt (desperately tries to knead it in).

Oh no, I forgot the oil (pours it on the dough and kneads it in).  Oops, it was just supposed to grease the proofing bowl.  What is going on with me today?

Ok, putting the dough into the couche now… oh no, I was supposed to do a short bulk fermentation in the refrigerator (desperately wraps couche in plastic wrap and puts in the refrigerator).

Looking good, time to put in the oven… um, Mr. Bread Maiden, when does your sauerkraut come out of the oven? FIVE MORE HOURS????

Time to score … and the razor blade falls into the dutch oven.  Great.

Out of the oven – it looks beautiful!

My FIL trying a piece: this needs salt.

Adding warm, not hot water.  And it looks like it’s supposed to! (phew).  Nice and stretchy, not gummy.

Doing well.  Added everything at the right time.  Decided I like the oil in the dough anyway.  Improves preservation.

Proofing going well.  I’m liking the couche method for the final rise.  It does seem to help the bread get a crust and keep a nice shape instead of flattening out during the final rise.  I imagine it is even more important for high hydration doughs.  Will have to do more investigation.

Turned out my dough from its couche into the hot dutch oven.  Miscalculated and it landed along the side of the dutch oven.  Had to shake the dutch oven to even it out.  Tried to use a serrated knife instead of a razor blade, which was much tougher.  Can’t pull the knife quickly at the necessary angle to score well.  I’ll have to pick up some razor blades for next week.

Wow! I don’t think I’ve ever heard bread singing this loudly.  Must be happy 🙂

Crusty crust, like last time.  The top looks beautiful despite the snags.

This recipe does need more salt.  And bigger holes.


Ok fine, Preston Yancey.  I’ll invest in some razor blades for a pretty scoring pattern.  It’s just a matter of time before I burn myself trying to do it with a serrated knife.
 

I swear I read the recipe each time, and each time I make a mistake.  What is the matter with me?  This is ridiculous.  When did the recipe call for the couches to be in the refrigerator for the final rise? 

I’d like to see how this recipe does with baguettes.  What would I have to do to modify it? 

I’m going to make these into baguettes!  
Ugh, I don’t have enough white flour!  Whole wheat it is then.  I’ll have to make sure the gluten formation is really strong for baguettes.
First time using a couche for baguettes.  
Ugh, I forgot the salt.  Again.  What is wrong with me?
These shape into baguettes really well!  But how am I going to bake them to get good oven spring?  Baking sheet saves the day!
Wow, I’m really impressed with how these turned out.  I bet they would be even better with all white flour.

Week 5wordpress background3

Pretty happy this week!  I even decided to invest in two bannetons because I am totally sold now on using a couche for the second rise.

What I’m not sold on? Grinding the salt.  It makes no sense.  I mean, I guess as far as mindless activities go it’s not the worst, but I don’t have the time for mindless activities. Even Mr. Bread Maiden gave me a skeptical look when I told him what I was doing.  That said, actually adding salt to the bread (unlike several weeks where I forgot it) made it much tastier.  Not sure if it needed to be freshly ground though.

Yippee, it’s week 5!  Almost done with the nine weeks of Preston Yancey’s white bread!

This week, I made a sincere attempt to follow Preston’s recipe, so I didn’t use any of the hacks I detailed in week 3.  So the holes in the crumb were back to being small.  Maybe next week.  One modification I did make though, from week 3 to week 5, was decrease the amount of flour from 1260 to 1150 grams in an effort to bump up the hydration a little.

Week 6DSC02867

I remembered to use Preston’s lidded container trick for the yeast mixture!

First time trying out the bannetons!  Aaaand… they stick a bit.  Going to use more rye flour next time.

I find myself wondering if Preston has adjusted his baking at all since having a kid.  It sounds awful but I feel like the kinds of things detailed in his recipe (grinding the salt, having a short rise instead of a long one, etc. are things that are difficult to do when you have a baby.  At least, they have been for me.  So many of my bread hacks are to weave flexibility into the process.  But who knows.  He is a writer, so he likely works from home and has the time to wait for bread to rise on its own schedule.

I remembered the salt!  But this dough is way too wet.

With all the things I remembered this time, somehow I forgot how much bread this dough makes!  Thankfully Mr. Bread Maiden and I have discovered 2-gallon storage bags, which are big enough to fit one loaf of this bread (or several half-eaten loaves).

Week 7

DSC03119

Wow, I’m really making this bread my own.  This week I kept increasing the hydration of the dough, and remembered to divide it into three loaves this time.  Forgot the oil but it’s not needed.  I also remembered to proof the yeast in a lidded tupperware so that I could shake it up, but I don’t know if it’s a necessary step so I’ll probably skip it when I’m done with this baking project.

Week 8

This week was a disaster.

IMG_4555IMG_4558

Next!

Week 9

IMG_4666

Woohoo!  I’m finally done with this challenge!  I cut the hydration down from 78% to 71%, and it did seem to work better this time as far as handling and shaping the loaves.  I thought my parents had a dutch oven so I didn’t bring one over to their house and ended up having to use a baking sheet and pyrex dish to bake these.  They ended up a little flat but otherwise perfect.

And that’s it!  Nine weeks of bread in one post.


Preston Yancey’s white bread, attempt #9

IMG_4666It’s my last time making Preston Yancey’s white bread for this challenge.  In his book, Out of the House of Bread, he asks readers to make his bread nine times.  Frankly, I may be the only one to have actually done it!  But I did it.

It wasn’t always easy.  I made plenty of mistakes.  I rued the day I started the challenge.  But I also came to appreciate many of his techniques, and will continue using them in the future.  I’ll also keep making this recipe, with some of my tweaks.

Anyway, I’m getting ahead of myself because I plan to dedicate another post to what I’ve learned.

This is about attempt #9.

Yesterday was just about the perfect bread baking day.  I love when it’s nice and steamy because it makes the dough rise so quickly.

DSC03194

I tried to take my time, doing each step the way he instructs in the book.  That means proofing the yeast in a tupperware container so you can shake it together before adding it to the larger dough.

DSC03195DSC03196

Nice and steamy on our patio

DSC03197DSC03198

One thing I did learn from making this bread nine times is that the loaves it makes are huge.  Now, if I remember to, I divide it into three loaves instead of two.

IMG_4664

Then the dough is shaped, placed in couches or banettons (the homemade banneton made out of a pyrex dish and floured towel is out of the shot) and refrigerated for an hour.

IMG_4667

The breads came out looking great!  I had to bake these at my parents’ house because they were having a dinner party with family friends, but I actually think that was a fitting way to say farewell to this project.  Bread in the Bible is always meant to be shared, and I was glad to be breaking bread with family and people I’ve known for my whole life.  I cut big crusty chunks, we slathered it with butter and ate it while drinking wine and catching up.  It was perfect.

Preston Yancey’s white bread, attempt #8

IMG_4555

This was not a good week for good bread.  However, as a result it will be a week about explaining what went wrong.

As you can see from the above picture, one loaf ended up abnormally tall, and one was totally flat.  The one that was too tall ended up that way because I didn’t let it rise for long enough during the second rise before baking it.  The flat one rose for too long.


Let’s back up a second: why is the second rise so important?

During the baking process, bread typically goes through one long rise, or fermentation after it is mixed.  This happens in a mixing bowl.  This helps the gluten form and develops flavor as the yeast eats up the sugars and releases carbon dioxide and ethyl alcohol.  If the gluten net forms, then it will trap all the carbon dioxide and cause the dough to rise.

After the first rise, it’s time to shape the dough into its final form before it gets baked.  That means either shaping it into a round boule on parchment, a braided pattern, rolls, or sandwich bread in bread pans.  In order to shape your dough, some of the carbon dioxide bubbles need to be crushed.  But that’s ok, because the yeast will keep eating sugars and your dough will spring back to normal after about 45 minutes to an hour.

So let’s start with the flat loaf.  The reason I picked this one to explain first will make sense in a second.

IMG_4557

Sometimes it’s hard to get the timing right for baking.  Even on the weekends, we’re out and about and don’t always know when we’ll be back home.  This time, I let my doughs rise the first time (the fermentation) overnight.  But I didn’t have time to bake them in the morning because I had church.  So I prepared my doughs in their banettons for the second rise, and put them in the refrigerator, hoping they would be ok for several hours.

DSC02912

But as soon as I pulled them out and transferred the first one to the oven, I could tell things were not ok.  After using my razor blade to score the top of the dough, it promptly deflated.

The reason it deflated is that the bread is what bakers call “over-proofed.” That means the yeast is allowed to keep eating sugars and releasing carbon dioxide until the inside is basically all air.  That’s why when I tried to cut through the dough to score it with my razor blade, it released all the air and deflated like a beach ball.

Now, the tall loaf.

IMG_4556

After seeing what happened to my first, over-proofed loaf, I knew I had to do something.  So I gently punched my loaf down again and re-formed my boule.  Then I let it rise for about 20 minutes, because by that point it was already like 10pm and I was getting sleepy.

So what happened to the tall loaf?  It was (duh) underproofed!  I didn’t give the yeast enough time after I re-shaped it to release enough carbon dioxide again.  So after I scored it and put it in the oven, the heat made the yeast go CRAZY.  The dough basically explodes up and out because the yeast wasn’t given enough time during the second rise.  Underproofed loaves look more like basketballs than bread.  They taste fine, but are oddly shaped.

IMG_4558

So there you have it.  Every so often I need a reminder that even though there are lots of tricks to getting bread to work around your schedule, it’s still the one in charge.  You’re still dealing with living organisms (yeast), and they do what they want to do.

I wasn’t planning on including this among my Preston Yancey white bread challenge posts because it didn’t turn out well, but I do think it is important to share it for its instructive value.  I would hate for people to always think I make perfect loaves every time.  Then where would the fun and adventure be?


Peter Reinhart’s multi-grain struan

DSC03180

I feel like my family goes through phases where we crave a certain kind of bread, then it switches to completely the opposite.

First, everyone craves a really sour sourdough.  Then a really hearty whole wheat.  Back and forth.

Right now, as you might be able to guess from the title of this post, we’re in a whole wheat, whole grains phase.  And Peter Reinhart’s multi-grain struan is just the thing to satisfy that craving.

This is the bread that put Peter Reinhart and his bakery, Brother Juniper’s, on the map.  He resurrected an old Scottish bread typically made for Michaelmas, the Feast of St. Michael the Archangel.  As St. Michael is the guardian of the harvest, it makes sense that this bread is loaded with grains- oats, wheat, corn, rice, and bran.

Reinhart puts it this way: “Struan is not merely bread– it is bread that represents the essence of bread.  In our everyday consumption of bread we tend to forget or lose sight of the reality of what bread is.  So a bread ritual, a harvest fair, dedicated to the archangel of the harvest whose name means ‘like unto God,’ is a way to tune into this deeper reality.”

It’s heady stuff to be sure, but this is a heady type of bread.  The bread smells amazing even as an unbaked loaf, so you can imagine how heavenly it smells as it comes out of the oven.

You will need:

DSC03165

7 cups of all-purpose or bread flour

1/2 cup cooked polenta

1/2 cup rolled oats

1/2 cup brown sugar

1/3 cup wheat bran

4 teaspoons salt

3 tablespoons active dry yeast

1/2 cup cooked brown rice

1/4 cup honey

3/4 cup buttermilk (or 3/4 cup milk and 1 tablespoon white vinegar)

2 to 2 1/2 cups water

1 egg white and 3 tablespoons poppy seeds or sesame seeds for decoration (optional)

DSC03166DSC03167

Step one is to make the buttermilk if you don’t have it. Pour the tablespoon of vinegar into 3/4 cup regular milk and let sit in the refrigerator for an hour.  You can help the process along by adding a tablespoon or two of plain yogurt or sour cream.

DSC03168

In a very large bowl, mix together your uncooked grains (polenta, rolled oats, wheat bran) and your flour, salt, yeast, and brown sugar.  If you don’t have brown sugar on hand, you can add a teaspoon of molasses to regular white sugar and combine them using a fork.

DSC03169DSC03170

Add the cooked rice, honey and buttermilk and mix.  Add one cup at a time of the water until your dough is well-hydrated and starts forming a ball.

DSC03171

I don’t usually knead my bread, preferring to let the dough do the work for me.  But this bread has a lot of large obstructions (all the whole grains) to proper gluten formation.  Also, it has a ton of yeast.  So, it help the gluten formation and speed the process along, I did knead this bread a little bit.  Sprinkle some flour on your counter and, using a bit of force, push your dough down and away from you with the palms of your hands.  Then pick the dough back up, shape it into a ball again, and repeat the process.  At first, the dough will stick to the counter.  But the more you do it, the dough should start sticking more to itself, and will pick up any dough stuck to the counter.  Once your counter is free of dough and it’s all sticking together in a ball nicely, return your dough to the large bowl, cover, and let rise in a warm place for about an hour.

DSC03172DSC03173DSC03174

When your dough has doubled in size, divide it into three more-or-less equal pieces.  Right after you cut them, let them rest for five minutes so the gluten relaxes a bit.  Then shape them into balls and either pop them into a banetton or put them on pieces of parchment paper and cover with an overturned bowl.

DSC03175DSC03176

I chose banettons, although this means I won’t be able to decorate my loaves with seeds.

DSC03177

Preheat your oven to 450 degrees F with a dutch oven inside.

If you decide you want to use poppy or sesame seeds to decorate, whisk together the egg white and a splash of water.  Brush your loaf with the egg wash and sprinkle the seeds on top.  The egg white will act as a glue to adhere the seeds.

When the oven is ready, place your loaf inside and bake for 25 minutes with the dutch oven covered.  Then remove the lid and bake another 15 minutes or so.

DSC03178

I scored my loaf once I flipped it from the banetton into the dutch oven.

DSC03179DSC03181

FullSizeRender.jpg

You can see from this picture that the holes were not very big.  You might even be able to see some of the grains in the crumb.

This loaf is delicious because it’s the right balance of hearty grains and sweetness from the honey and brown sugar.  It’s perfect in the morning toasted with jam or butter.

Multi-grain Struan

  1. Combine flour, oats, wheat bran, polenta, brown sugar, salt and yeast in a very large bowl.
  2. Add brown rice, honey and buttermilk.  Stir to combine, then add water, one cup at a time, until the dough is well hydrated.
  3. Knead the dough on a lightly-floured surface until it sticks to itself well and is smooth and not sticky.
  4. Return the dough to its bowl and let rise in a warm place for about one hour until doubled in size.
  5. Divide dough into three balls, then let rise one more hour either on pieces of parchment or in banettons.
  6. Preheat oven to 450 degrees F with a dutch oven or heavy baking sheet inside.
  7. Bake your loaf for 25 minutes with the dutch oven lid on, then 15 minutes with the lid off.
  8. When bread is finished baking, remove it to a cooling rack and let cool completely before slicing.

Bread Camp III

IMG_4594

About three years ago, a friend asked if I would teach her how to make bread.  We invited two other friends to join us, and Bread Camp was born.  Since then, I’ve done Bread Camp two more times with other groups of friends.  Each time, it becomes a little more professional: I print out notes pages, I am better at anticipating questions and I know how much time to allot for each task.  I’ve also learned how to teach motions and techniques that I’ve been doing for so long that I do without thinking.

IMG_4597

Bread Camp notes keep expanding

You can read about the Bread Camp I hosted last year here.

Last night we had six people attending Bread Camp.  I expanded it to two and a half hours, although people hung around for three hours.  Since it took place from 5-7:30pm, we made it a potluck which was fun too and gave us something to do while we waited for the bread to bake.

IMG_4596

at one point I had to draw a picture of a wheat kernel

Everyone was so encouraging, and asked great questions.  When they all left I was tired but still walking on cloud nine.

IMG_4592.JPG

since about half the class didn’t own a dutch oven, I taught them how to use a heavy baking sheet and a pyrex dish to achieve the same effect of trapping steam.

Then I woke up the next morning to pictures of everyone baking their creations and I was back on cloud nine.

IMG_5427


13327512_10104055374349217_7891619855731519226_n

Link to friend’s instagram with video of her loaf “singing” as it came out of the oven!

FullSizeRender

IMG_4600

I love this- my sister brushed hers with egg white and then sprinkled thyme on top! I bet it was delicious.

image

Something else we did as we ate and chatted was talk about how to possibly expand Bread Camp, and open it to friends of friends.  I don’t think I want to make it public just yet, but I’m running out of interested friends that live in the area, and each time I teach it I’m reminded of how much I enjoy teaching it.  Another option we discussed was doing a couples class, which might be fun around Valentine’s day.  I’ve also heard some interest in having a more advanced class, such as for enriched breads, whole grain breads, or working with sourdough starter, or pizza dough.

So I have a lot to think about going forward, which is never a bad place to be!

IMG_4586.JPG

gurgling yeast as a metaphor for my brain

Strawberry Rhubarb Streusel Cake

DSC03163.JPG

Adapted from My Baking Addiction’s Strawberry Rhubarb Cake.

Last week, we received two bright red stalks of rhubarb in our CSA bag.  Knowing that rhubarb pairs perfectly with strawberries, and how much Little Bread Dudes love my blueberry yogurt cake, I went in search of a recipe that was slightly sweet, slightly tart, and could be served for an indulgent breakfast.  This is what I found.

DSC03151

You can make the streusel topping ahead of time, and refrigerate it until you’re ready to use.

My one complaint with this recipe is that all the moving parts require separate bowls, which generates a lot of dishes.

You will need:

to prepare your pan:

1 tablespoon butter

3 tablespoons AP flour

for the streusel:

6 tablespoons (85g) melted butter

1 cup (or more) AP flour

1/2 cup brown sugar

for the cake:

1 cup chopped strawberries

1 cup chopped rhubarb

1 tablespoon sugar

1 cup all-purpose flour, divided

1/2 teaspoon baking powder

1/4 teaspoon salt

1/2 cup (100g) unsalted butter, room temperature

1 cup confectioner’s (powdered) sugar

2 eggs

1 teaspoon vanilla extract

  1. Preheat your oven to 350 degrees F.  Butter an 8-inch glass dish and cover it with a piece of parchment paper.  Then coat the paper and the rest of the dish with more butter.  Dust the pan with flour to coat.  Set it aside.
  2. Melt the butter in a medium-sized bowl.  Add brown sugar and flour until the mixture is dry and the consistency of small crumbs.  Refrigerate until needed.
  3. Mix together 3/4 cup flour, 1/2 teaspoon baking powder and 1/4 teaspoon salt in a medium-sized bowl.  Set aside.DSC03154
  4. Mix together chopped rhubarb, chopped strawberries, 1 tablespoon sugar and 1/4 cup flour.  Set aside.DSC03152
  5. In a large bowl, mix the 1/2 cup room temperature butter and confectioner’s sugar with a hand mixer for three minutes until light and fluffy.  DSC03155
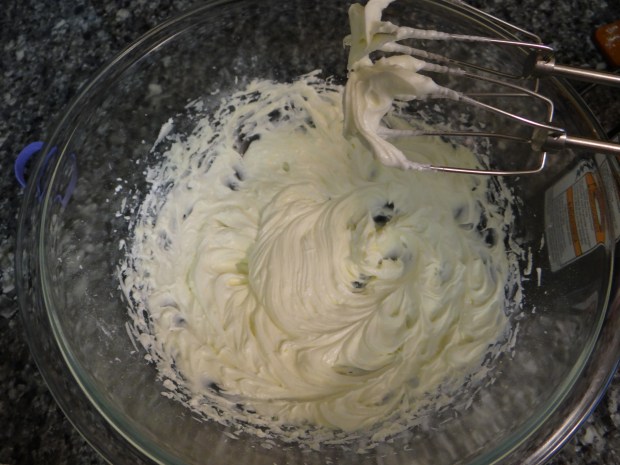
Add the eggs one at a time, then the vanilla extract.DSC03156
  6. Add the flour mixture to the butter and egg mixture using a silicone spatula and stir until combined.  Use the spatula to transfer it to your prepared 8-inch glass pan and spread it evenly along the bottom of the pan.DSC03158
  7. Spread your strawberry rhubarb mixture on top of that.DSC03159
  8. Spread the streusel topping on top.  DSC03160
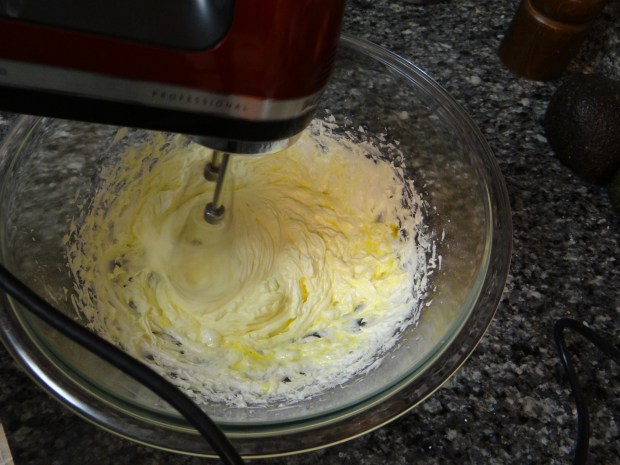
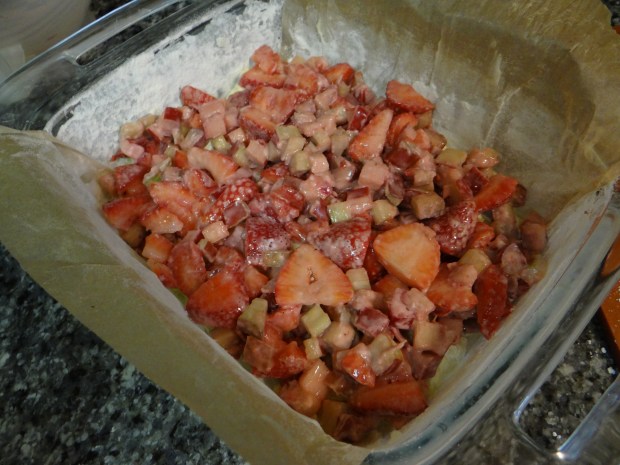
Bake for 45-55 minutes until the streusel is golden brown.  Remove from the oven and let cool completely.  DSC03161
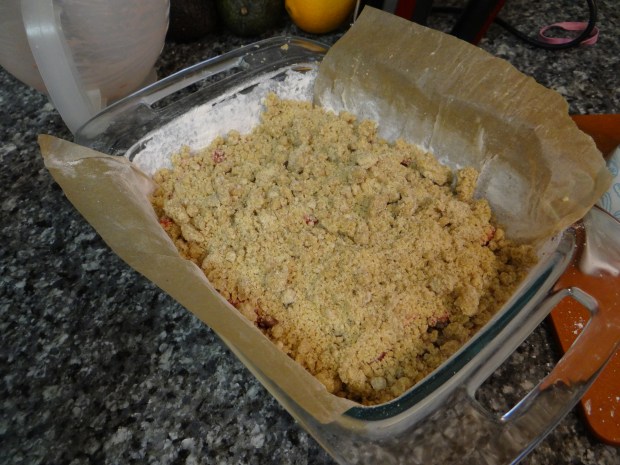
Remove from the pan using the parchment paper and slice into 16 pieces.DSC03164

A Bread Library Review: Pretend Soup and Other Real Recipes

DSC03138

Most of my reviews are for your typical cookbooks, written and meant for adults.  This book, Pretend Soup by Mollie Katzen and Ann Henderson, deserves a spot on any family’s cookbook shelf.

This is the book I was meant to find.  I don’t have a lot of experience with kids’ cookbooks, but this one rates pretty darn high for me.

When I was imagining the perfect cookbook for kids, I knew it had to have lots of pictures illustrating the steps.  This book has that, and so much more.  It’s also a guide to teach parents how to cook with their kids.

DSC03092

The illustrations are brightly colored and fun to look at.

DSC03093

The advice from the kid testers is hysterical.  There are also kid reviews for each recipe.

DSC03097

The cookbook says it’s for preschoolers and up, and my preschooler loved it.  He chose to make hide and seek muffins, which I detailed here.

DSC03122

He was mostly able to understand the pictures, although some were confusing, like the bag of flour could be mistaken for a bag of sugar to the non-reader.

DSC03127

The recipe is also written in the traditional way for adults.  There are lots of tips for parents so the experience is low-stress.  I know I (unfortunately) tend to freak out about mess, even as I try to remind myself it’s about the process.  The authors don’t judge; they make good suggestions like choosing the largest mixing bowl to reduce mess, or placing a measuring cup over a baking sheet to catch spills.

DSC03131

DSC03128

Best of all, my little guy really took ownership of the baking process.  He let me know what to do next, and was so generous sharing the muffins with me and his baby brother.

DSC03142

Look at that proud face!  I will probably buy more copies for kids I know who enjoy cooking.  You should too.

Cooking with kids: hide and seek muffins

DSC03138.JPG

Since Little Bread Dude started showing an interest in cooking, I’ve thought about how cookbooks could be structured to appeal to kids.  Obviously, there would have to be a lot of pictures.  It seemed like an obvious cookbook market expansion area.  After all, Master Chef Junior is such a hit, it seems like there should be cookbooks out there for the pre-reading set.

DSC03095

I guess I had that thought floating around in my head when I went to a Master Food Volunteers demonstration a few weeks ago.  One of the volunteers was someone I’d met before at another volunteer outreach event; the two of us began talking about kids and cooking since she has a son who is older.

When I asked about cookbooks for kids, she recommended Pretend Soup by Mollie Katzen and Ann Henderson.  I checked it out on Amazon and immediately ordered a copy.

I’ll do a more in-depth review in a later post, but I just want to say: this cookbook is beautifully written and wonderfully executed with pictures, advice, and hilarious kid quotes.

DSC03097

Then came the waiting.  I knew if I just gave the book to Little Bread Dude, he would like it well enough.  But if he DISCOVERED it on his own, that would make all the difference as to whether it was perused and then set aside, or if it became a bedtime favorite read at night under the covers with a flashlight.

I was not wrong.  It took probably four days for him to discover it on our entryway table, but he was totally hooked once he did.

DSC03121

I let LBD pick the recipe he wanted to make.  He picked the hide-and-seek strawberry muffins.  We didn’t have strawberries so we used frozen blueberries and blackberries instead.

Most of the steps are illustrated.  He was mostly able to figure them out himself (he did mix up the bag of flour with sugar).

DSC03122

He was able to do basically all of the steps himself.  I melted the butter, spooned out the batter into the muffin tin, and took the muffins in and out of the oven.  He measured all the other ingredients, did the stirring, set out the muffin liners, and placed the berries on top.  He’s getting better at more complicated measuring techniques, like leveling off the top of the measuring cups when measuring the dry ingredients.

I was so proud of him!  Usually he does not like cracking eggs but he did those too.  The recipe has lots of advice to parents to make it a less stressful experience, such as using the biggest bowl possible so there’s less mess 🙂

DSC03132

DSC03134

we ended up making some mini muffins with the leftover batter, but by that time LBD had already eaten the leftover berries so they were plain.

DSC03142

Tasting the muffins required a costume change

DSC03141

He pronounced them good!  More importantly, he was very proud of himself.  This will be a cookbook I’m sure we’ll pull out again and again.

Hide and Seek Muffins

For 12 muffins, you will need:

1.5 cups flour

1/4 cup sugar

2 teaspoons baking powder

1/2 teaspoon baking soda

1/2 teaspoon salt

1 cup milk

2 eggs

4 tablespoons butter, melted

1/2 teaspoon vanilla

1/2 cup frozen or fresh berries

  1. Preheat the oven to 375 degrees F.  Line muffin tin with liners.
  2. In a very large bowl, whisk together the flour, sugar, baking powder, baking soda and salt.  Set aside.
  3. In a medium-sized bowl, stir together the milk, eggs, melted butter and vanilla.
  4. Add the wet ingredients to the dry and stir 20 times with a spoon.  Decant the batter into the muffin tin until each cup is 1/2 way full.  Add the berries on top.
  5. Bake for 15-20 minutes until the top feels solid and a toothpick comes out clean.  Let cool 10 minutes before eating.

I highly, highly recommend this cookbook for anyone with a kid who knows, wants to know, or thinks they know their way around a kitchen!