One bread, two crusts

DSC03117

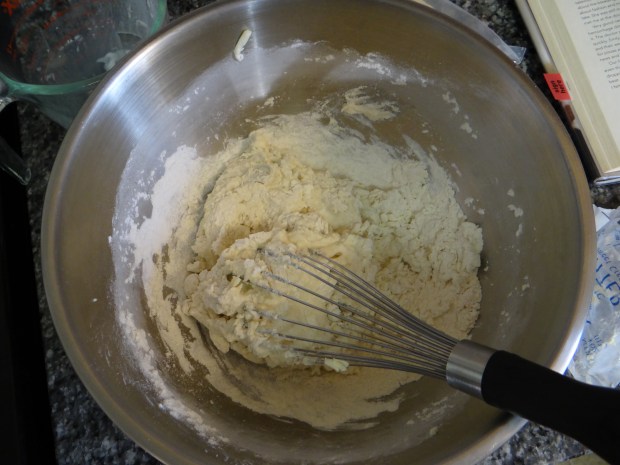
Halfway through baking Preston Yancey’s white bread for the seventh time, I suddenly remembered that I needed to make bread for communion this week.

Now, you might think that one bread is as good as another, as far as that goes.  But you would be wrong.

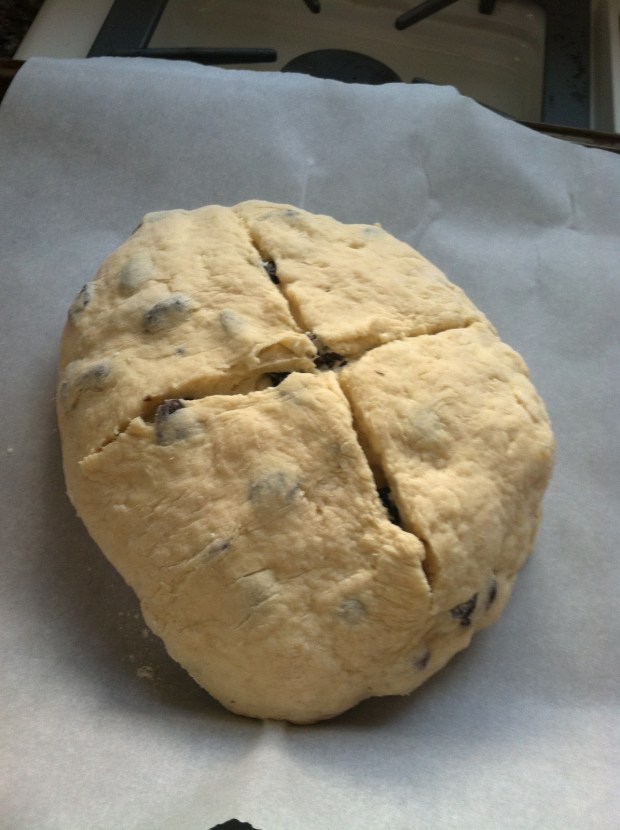
The bread I bake for communion doesn’t just have to be tasty and look pretty.  It also has to tear apart fairly easily.  I can’t tell you the number of times I’ve sat in church cringing as the pastor twists and pulls at my bread, even though it’s been pre-cut 3/4 of the way through.

435ff-irishsodabread013

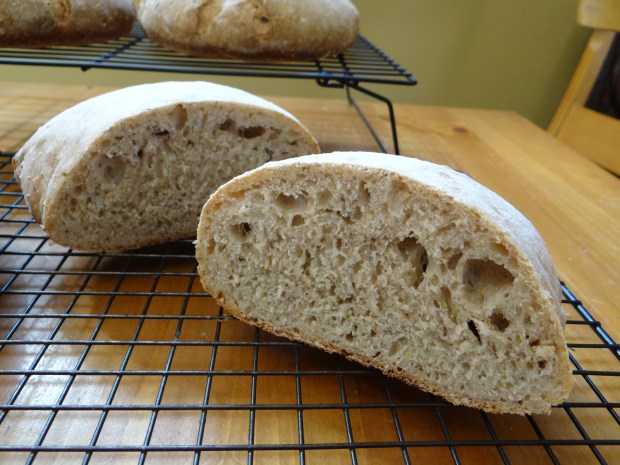
The inner crumb is always easy to pull apart, but my communion bread needs a soft crust as well.  Lucky for me, the difference between a crusty crust and a soft crust is all in the baking method.

This is like a choose your own adventure!

1. If you want a crusty crust

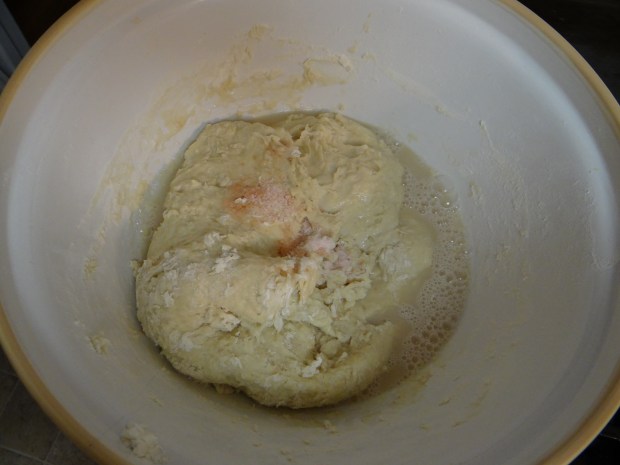
Prepare the dough you want to bake.  A crusty crust works best with a dough that is mostly lean (meaning without a lot of fats like eggs, milk and butter).

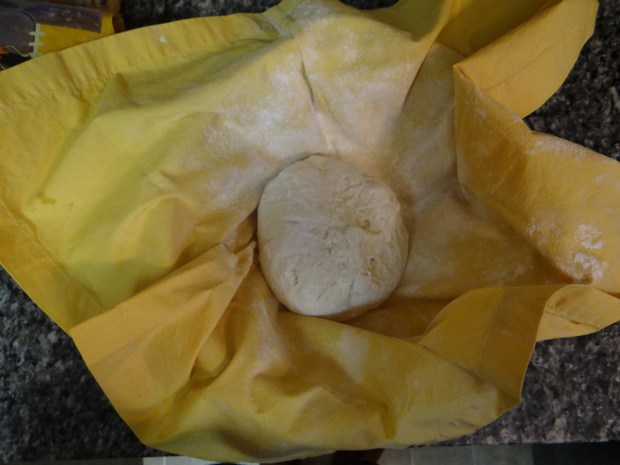
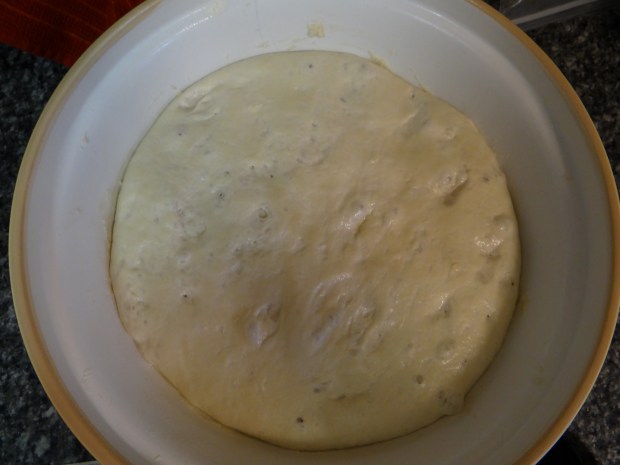
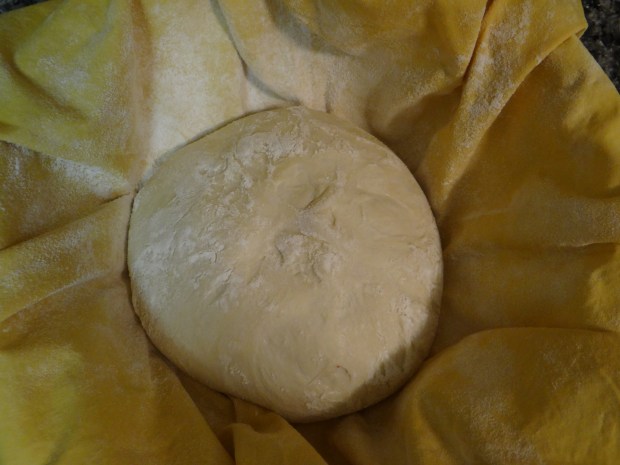
After the first rise, shape your dough and move it to a floured couche or banneton.  Let it sit in the fridge for an hour while you preheat your oven.

DSC03107

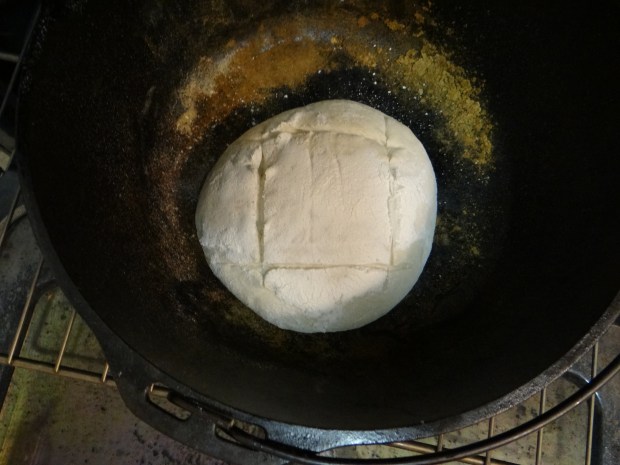
This is the same for both crusty and soft bread: put a dutch oven in the oven and preheat it to 450 degrees F.  Score your dough and put it in the dutch oven with the lid on.  Bake for 15 minutes.

DSC03110

If you want crusty crust, keep the lid on the dutch oven but bump the temperature down to 375 degrees F.  Bake an additional 15 minutes.

After 30 total baking minutes have elapsed with the lid on, remove the lid and bake a final 10-15 minutes until the crust is hard if you tap it with your finger.

DSC03111

2. If you want a soft crust:

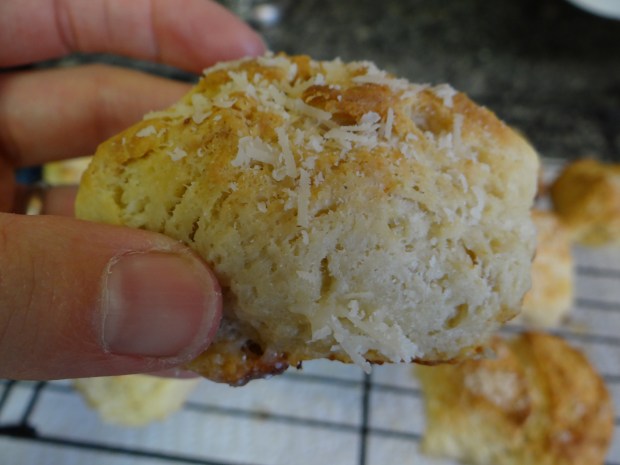
The key to a soft crust is to soften it with an egg wash before it goes into the oven, and bake at a low temperature after the initial oven spring is done.

6aa84-dscn2038

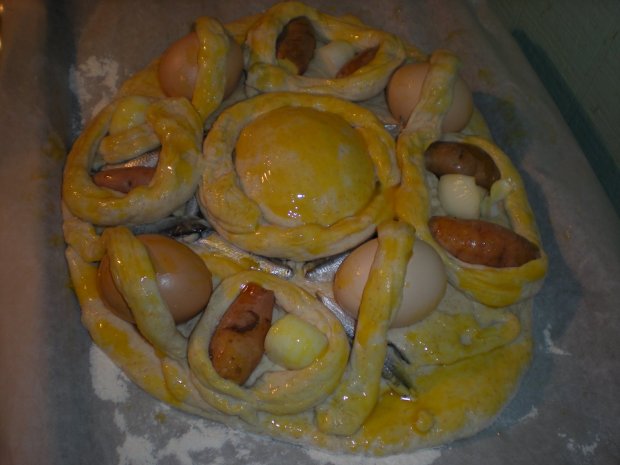
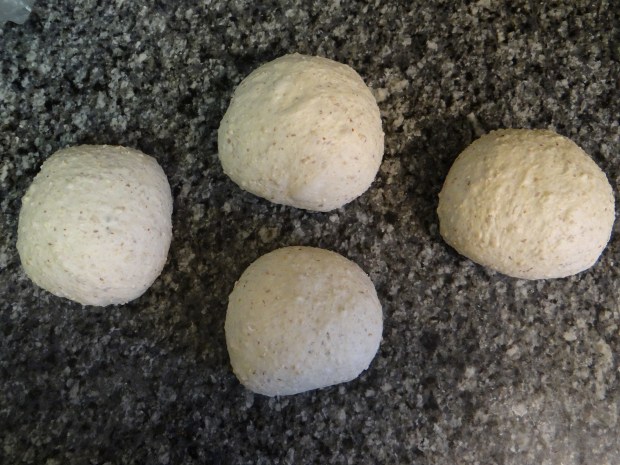
obviously this is not a boule but you get the idea with the egg wash

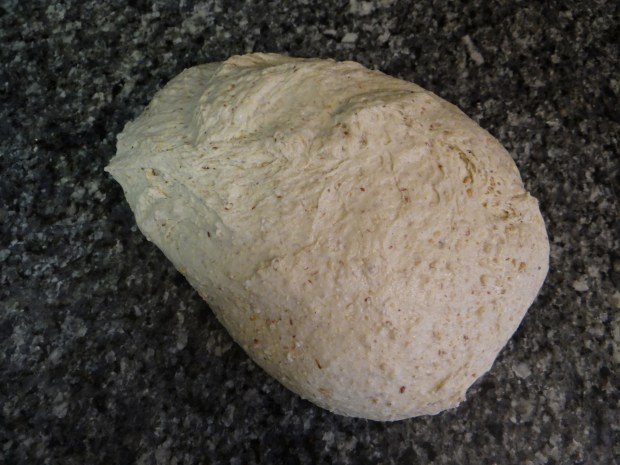
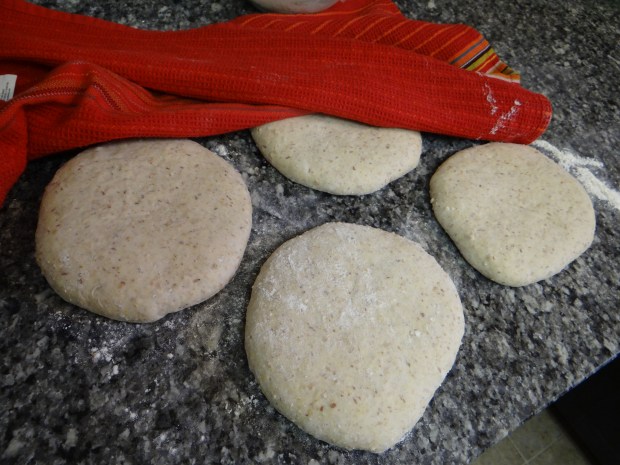
Once again, prepare the dough you want to bake.  After the first rise, shape it into a boule and place it on a piece of parchment paper.  Cover it with a bowl and let rise one hour while you preheat the oven (with the dutch oven inside) to 450 degrees F.

3b937-dsc02639

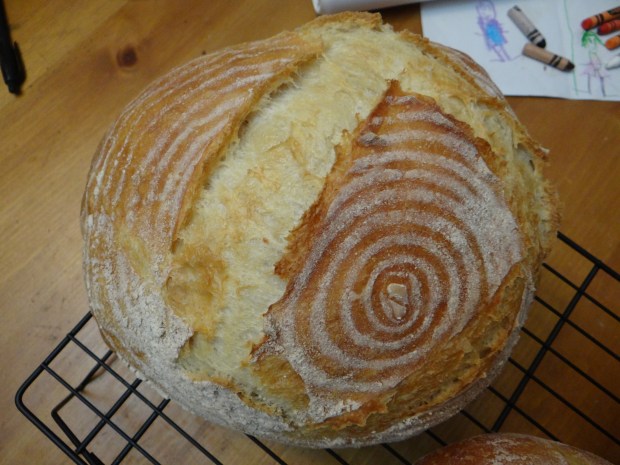
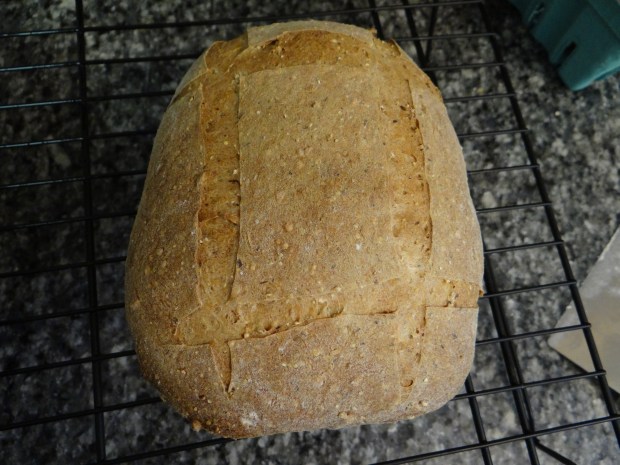
When the oven is ready, brush the top of your boule with an egg wash and score it with a razor blade in a pretty pattern.  Then move it to the oven and keep the lid on for the first 15 minutes.

Rosca de Reyes Part II: Three Kings' Buns!

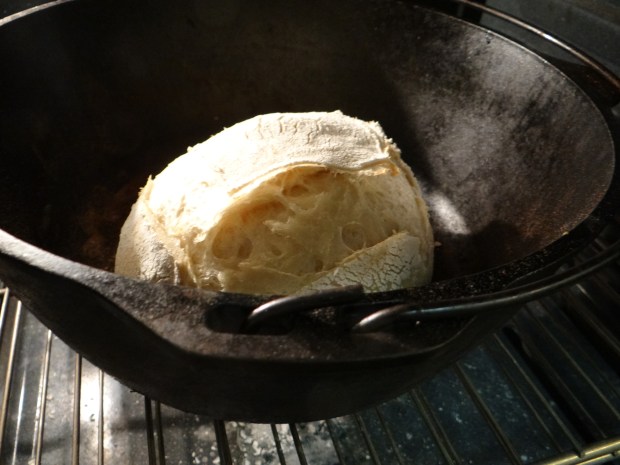
Now, you will bump the temperature down to 350 degrees F and remove the lid.  Why do this?  If you keep the lid on, the temperature inside the dutch oven is going to stay at 450 degrees.  If you remove the lid, the baking temperature is going to go down much faster.

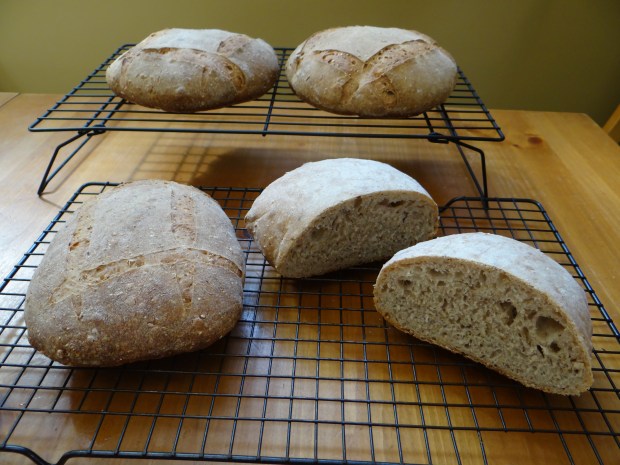
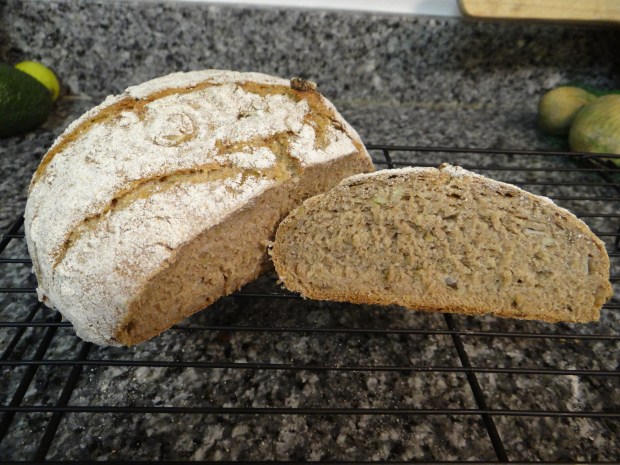
Bake an additional 20 minutes with the lid off until the crust is hard when tapped (don’t worry, it’ll soften as it cools).  Remove your dough and let it cool on a rack for at least two hours or overnight.

So there it is: the secret behind getting the crust you want.  Literally any bread can be made with a crusty or a soft crust, as long as you know what to do.


Preston Yancey’s white bread, attempt #7

DSC03119

What is there to say?  It’s my seventh time making this recipe.  And yet, I keep learning and tweaking.  Here are some highlights:

DSC03098

Woohoo, I remembered to bloom the yeast in a lidded tupperware so I could give it a good shake before adding it to the dough.

DSC03099

I used 1050g of all-purpose flour, which is less than last time.  What can I say? I like that high hydration for maximum holes.

DSC03100

fully bloomed yeast

DSC03101

decided to mix it up by using Himalayan pink salt

DSC03102DSC03103DSC03104

DSC03105

After about five hours, the dough was looking good.

DSC03106

Since this recipe makes such large loaves if you only divide it in half, I divided it into one slightly larger loaf (for communion this Sunday) and two slightly smaller loaves.

DSC03107

Since I was making three loaves, I used my two bannetons and then made a couche out of a pyrex bowl and a floured napkin.

DSC03108

DSC03109

Since I couldn’t bake these right away, I left them in the refrigerator for about two-four hours.  They were totally fine.

DSC03110

Dough just after scoring, in the dutch oven.

DSC03111

Dough immediately after removing the lid of the dutch oven.  Since I wanted slightly soft crust, I bumped the temperature down to 375 degrees F after removing the lid.

DSC03116

You can tell which doughs were shaped in the bannetons

DSC03117DSC03118DSC03119

I was very happy with this set of breads.  This recipe (with my variations) is becoming my go-to white bread recipe.

My next post will be about tweaks I make for a softer or a crustier crust.  Stay tuned!

A Bread Library Review: Brother Juniper’s Bread Book by Peter Reinhart

DSC03054

I have a confession: I adore Peter Reinhart and his writing.  The intersection between faith and breadbaking he writes about in passing has always fascinated me.

In this book, Brother Juniper’s Bread Book, he brings this relationship front and center.  That said, it is not just a meditation.  It’s also a really great beginner’s bread cookbook.

DSC03055DSC03059

The entire book is imbued with a writing style that is at once authoritative and tongue-in-cheek.  It doesn’t take itself too seriously.  I found myself laughing out loud at some of the passages and reading them aloud to Mr. Bread Maiden.  This chapter, titled “On Not Cutting Into Bread Too Soon”, has a pull quote on the opposite page that just says, “don’t cut into bread too soon.”  Ha ha!DSC03060

One of the reasons this book is a good beginner book is that all the recipes call for commercial yeast.  He reasons that any reader who works their way through this book is ready for one of his other books that does tackle sourdough.

DSC03061

One of the passages that made me laugh

DSC03062

Ha ha, so true!

DSC03063

DSC03064

The spiritual importance of kneading

DSC03065

the intersection of kneading and grace

DSC03066

This review is just going to be screenshots of my favorite passages.  I hope that’s ok.

DSC03068

The glossary gives a definition of “thwack.”

DSC03069

Another paragraph that demonstrates how much fun Reinhart must’ve had writing this book.  At least, I hope his tongue was firmly in cheek writing this!

DSC03070

Each chapter and nearly every recipe is illustrated with beautiful woodcut prints.

DSC03071

Speaking of struan, I’m planning on making this when there’s more space in the freezer.  It’s killing me not being able to try out all these recipes!

I enjoyed this book and am very glad it’s mine and not a library book.  When beginners ask me what bread book they should pick up, I’m going to recommend this one, hands down.

A Bread Library Review: Neel and Pugh’s The Food and Feasts of Jesus

DSC030451

A few weeks ago, I went on a library binge and checked out every book I could find about food during the time of Jesus.

This one was far and away my favorite.

DSC03046

One of the reasons I liked this so much is that it was organized into meals.  The authors clearly had in mind a spirit of sharing and fellowship when creating this book.

DSC03047

I was impressed by the research they did.

DSC03049

DSC03026[1]

I’ve learned a lot from all of these books, and I do read them all the way through, but my particular interest is in the breads.  And this one did not disappoint.  It had seven distinct bread recipes.

DSC03021[1]

I combined elements of the wheat and barley bread and the Mediterranean grain bread to make the bread below (recipe here).DSC03042

The rest of these are recipes I hope to try one day soon.DSC03050DSC03051DSC03052

When I got to the bios, I understood why I liked their book so much.  Their combined interests in theology, catering, and research is clear on every page.DSC03053

I know I’m getting repetitive with all these book reviews, but this is another book I would definitely recommend checking out!

First century AD bread

DSC03042

I’ve been making my way through my trove of library books on biblical and first century AD foods.  In particular, of course, my focus is on the breads.

Douglas Neel and Joel Pugh’s The Food and Feasts of Jesus is my favorite so far.  I like how the recipes are grouped into meals that 1st century Jews and the early Christians might have eaten to commemorate holidays like Passover, events like a wedding feast, or holy observations like the Sabbath.

The recipes are at once exotic and doable.  There are recipes for homemade yogurt and raisins, as well as short ribs with barley.  Yum!

There is no single section about bread but the authors include several recipes to accompany each meal.  They stress the importance of bread during Jesus’ time and in the culture around him.  The authors have clearly done their research and their descriptions include the eating habits of all social classes in the region, which were many during the Roman occupation.  The focus, of course, is on the Jews living in the area surrounding Jerusalem.

DSC03026[1].JPG

This recipe is adapted from two bread recipes in the book: Mediterranean Grain Bread on page 44, and Barley and Wheat Bread on page 132.

DSC03021[1].JPG

First, I made their 10-grain flour mix, which I detail here.  They do point out that many of the grains in Bob’s Red Mill 10-grain flour mix would not have been available in the Middle East in Jesus’s time (such as corn and quinoa).

DSC03019[1].JPG

Nor would the people of Jesus’s time have had access to finely-milled all-purpose flour.  That said, they would have already been using natural leavening in the form of a starter, a fact I found fascinating.  Apparently the air there is full of Saccharomyces bacteria.

DSC03020[1].JPG

Since the recipe calls for 1.5 cups of barley flour, I measured and ground 2 tablespoons of each type of grain.

DSC03022[1].JPG

You will need:

1 cup active starter

2 cups water

1.5 cups barley flour or 10-grain mix

3.5 cups all-purpose flour

1 tablespoon salt

1 tablespoon honey

1 tablespoon olive oil

1. Mix together all the ingredients in the bowl of a stand mixer.  Mix with a bread hook for 5 minutes, let rest for 15 minutes, then mix another 5 minutes.  If it doesn’t come together in a ball in the first five minutes, add more flour in 1/4 cup increments until it does.  I only needed the 3.5 cups.

DSC03024[1].JPG

2. Cover the bowl with a kitchen towel or plastic wrap and let sit until doubled in size, about 4-8 hours.

DSC03025[1].JPG

3. After rising, take the dough out of the bowl onto a floured surface and punch down with your fingers to allow the gases to escape.  Divide the dough into four equal pieces and flatten them out until each piece is about 6-8 inches across and 1.5 inches thick.

DSC03027DSC03028DSC03029DSC03030DSC03033

4. Flip the dough a few times so it’s coated in a thin coating of flour.  Then cover with a kitchen towel and let it rise another 40 minutes.

DSC03034

5. Preheat the oven to 450 degrees and place a heavy baking sheet or a cast-iron skillet inside the oven to heat up.

6. Score the top of the dough using a razor blade, then transfer each dough from the paddle to the skillet and bake 20-25 minutes until golden brown and puffy.

DSC03039DSC03035DSC03040

7. Remove bread and let cool for at least two hours.

DSC03043

DSC03044

this loaf was baked according to the original recipe, which used a lower temperature, less cooking time, and did not have you score the top.  I used my adaptations for the other three and they came out much better.

I was quite happy with how the bread turned out; it is soft but maintains a nice crunch from the whole grains.

While this bread is delicious, I’m not sure it really qualifies as bread that would’ve been common in Jesus’s time.  First, they would not have had most of the grains I included in my 10-grain mix.  Second, they would have had wheat but not the highly-processed all-purpose flour which lends itself to good gluten formation and thus lots of air pockets in the crumb.  Also, the recipe calls for using a stand mixer to knead it.

I may, in the future, try and make bread only using ingredients and methods they would’ve recognized in 1st century Jerusalem.  This means switching my starter from using all-purpose flour to one that uses rye, and using primarily milled whole wheat, barley and flaxseed meal.

Have you ever tried making traditional breads?  Let me know in the comments!

Nifty Thrifty: whole grain flour mix

DSC03023[1]

After hitting publish on my recipe for 10-grain flour, I realized it would be perfect for my Nifty Thrifty series!

But here’s the trick that makes it thrifty: instead of running out and buying random grains like quinoa flakes, store up the last dribs and drabs of oats, cornmeal, rice, and pasta and grind them up to make your own whole grain flour!

DSC03019[1]

It’s the same technique as making bread crumbs: when you are down to the bottom of the bag or tin, throw it in a plastic bag and store it in your freezer.  Each time you have a little bit of rice or oats that is too small to use, throw it in the bag.  When you have about a cup’s worth, take it out and grind it up into a fine powder.

DSC03022[1]

Then use it in bread or store it in your freezer until you want to use it.  It’ll keep for a long time.

DSC03025[1]Thanks for checking out Nifty Thrifty!  I’d love to hear your ways to save money. Add a comment below.

Homemade 10-grain flour mix

DSC03023[1].JPG

One of the recipes in Neel and Pugh’s The Food and Feasts of Jesus calls for either Bob’s Red Mill 10 Grain Flour mix or a homemade 10 grain mix.

I had never made a flour mix, but I do have lots of grains laying around to use.

DSC03018[1].JPG

You might be surprised at how many grains you have at your house.  You already have a five-grain mix if you have oatmeal, corn meal, quinoa, couscous and wild or brown rice.

I used oatmeal, corn meal, wild rice, spelt flakes, quinoa flakes, flaxseed meal, rye flour, barley, and two kinds of wheat berries.

Other grains you could try are: amaranth, bulghur, sorghum, millet and buckwheat.  You could even add other wheat products such as wheat bran or wheat germ.  Since I was already using whole wheat berries I decided to skip those even though I do have them.

DSC03022[1].JPG

Since you are using unprocessed whole grains, they contain fat that goes rancid if not used immediately or stored properly.  If you can’t use them up right away, store them in a plastic bag in the freezer.

I needed 1.5 cups of flour, which comes to 24 tablespoons.  I added two tablespoons of each type of grain I had, which magically came to about the right amount after grinding.

I ground about 4 tablespoons of grains at a time until they were all about the texture of cornmeal.  The flaxmeal, cornmeal and rye flour were added directly to the mix without grinding because they didn’t need to be any finer.  As long as the grains are about the size of couscous, you should be fine.

DSC03025[1]I used 1.5 cups of my whole grain mix with my starter, 2 cups of water, and 3.5 cups of all-purpose flour.  Be aware that you can’t use the grain mix to replace all of the flour in a recipe, you can replace 1/4 to 1/3 of the flour and still get a nice gluten development along with all the extra flavor of your grain mix.

I can’t wait to see how it turns out!  (I did end up making it; results are here) I will definitely be making this 10-grain flour mix again.

A Bread Library Review: Shauna Niequist’s Bread and Wine

DSC03012

I was very excited to pick up this book at the library.  I loved Shauna’s devotional book “Savour” and the introduction she wrote for Preston Yancey’s book.

1b291-dsc02334

Shauna also gave me one of my favorite recipes, blueberry (or raspberry) yogurt cake!

Given the title, I assumed that she was going to focus on bread and wine, the elements of the Last Supper, and spirituality.  But the real focus of the book is the tagline: a love letter to life around the table, with recipes.

Very little of the book is an exploration of pure faith.  Although you could probably argue that the whole thing is about living your faith, connecting with others and learning to love yourself.

DSC03013DSC03014

I love this quote by C.S. Lewis.  It really sums up the point that Shauna makes over and over again: the sacred and profane are not opposites, but work together to demonstrate the fullness of God’s kingdom.

DSC03015

This chapter was my favorite.  You can probably guess why.


Overall, I enjoyed the recipes and her stories.  They wove a full picture that included the general and the personal in a way that was more successful than Preston Yancey’s Out of the House of Bread, which by all accounts was a very similar book.  Hers just exudes more love and warmth, inviting the reader to share in her journey with the heartbreaks and the triumphs.  You feel like another friend invited to sit at her table.

One criticism (and it’s a small one) is that the stories did get a little repetitive after a while.  She had her theme and dang if she didn’t stick to it!

Another thing I really liked about her book is the list of recommended reading.  I’ve read Anne Lamott and Barbara Kingsolver and I’m excited to check out other books she suggests.

DSC03016DSC03017

Yesterday I tried out her goat cheese biscuits and they were wonderful!

She also includes a recipe for Jim Lahey’s Sullivan Street Bread, which most people know as the famous NY Times no-knead bread.

In all, this was a good book that really invites you to get into the kitchen and explore her recipes.  Her husband eats gluten free, so many of the recipes included are gluten and dairy-free.

I wish this wasn’t a library book because I have to give it back!

Have you read any good books lately?  Do you have a cookbook addiction like me?

Shauna Niequist’s goat cheese biscuits

DSC03010

I feel bad for subjecting my readers to book review after book review.  The truth is that I haven’t baked bread in nearly a month.

Here’s why:  we buy meat in bulk, in the truest sense of the word.  When we buy beef, we buy it on the hoof.  We contact the farm, send them a list of how we want our cow cut up, and then a few weeks later we go there with big coolers and pick up several hundred pounds of beef, frozen and wrapped in paper.

IMG_4446IMG_4448IMG_4450

This usually lasts us a year.  We do the same thing with our pork, although some of the pork gets smoked.  So we pick it up in Fredericksburg, Virginia then drive it to Maugansville, MD to the smokehouse.  The reward is the most delicious steaks, roasts, bacon, sausages and fat you’ve ever had.

IMG_4451

The downside is that you have to have enough room to store all this meat.  We have a deep freeze in the basement that fits it all, but because of my quest to bake all 18 loaves called for in Preston Yancey’s Out of the House of Bread, the freezer was stuffed to the gills with frozen loaves of bread.  This would not do.

So for the past few weeks, I’ve placed a moratorium on baking and I’ve been giving away bread as fast as I can so we’ll have space for the meat.

Today I couldn’t take it anymore.  So I made some bread that I knew would not last long enough to freeze – Shauna Niequist’s goat cheese biscuits.

DSC02999

They are super easy and quick to throw together, if you use a few of my tricks.

For 12-14 biscuits, you will need:

2 cups all-purpose flour

1 cup buttermilk (or milk and 1 tbls white vinegar) or yogurt

4 tablespoons goat cheese

3 teaspoons baking powder

2 teaspoons salt

1/4 cup parmesan cheese

7 tablespoons butter, 4 tablespoons chilled and three tablespoons melted

1.Preheat the oven to 425 degrees F with a cast-iron skillet inside.

2.If you don’t have buttermilk or yogurt, mix together the milk and vinegar and let sit for ten minutes to curdle.

DSC03000

3.Whisk together the flour, baking powder and salt in a large bowl.

4. Add the goat cheese to the buttermilk mixture.

5. Using a grater, grate 4 tablespoons of chilled butter into the flour mixture.

DSC03002

6. Whisk the butter into the flour until it’s well-coated.  Then pour in the goat cheese/buttermilk mixture.

DSC03003

7. Knead JUST a little bit to make sure everything is incorporated and the goat cheese is evenly distributed throughout.  Then take the dough out of the bowl and place it on a clean counter.

DSC03004

8. Using a bench scraper or a butter knife, divide the dough into 12-14 equal-sized pieces.

DSC03005

9. Now take your skillet out of the oven and place it on your stovetop.  Throw one tablespoon of butter in the bottom of the skillet.  Get your bowl of melted butter ready.  Take each piece of dough, gently roll it in a ball, then roll it in the melted butter and place it in the skillet.

DSC03006DSC03007DSC03008

10. When all of your dough is in the skillet, return it to the oven and bake for 15-30 minutes.  I found I needed way more time than Shauna advises before they got sufficiently brown and fully-cooked.

DSC03009

They were so beautiful!  I will say, I had a little snafu with the parmesan cheese, which you are supposed to sprinkle the biscuits with immediately after you take them out of the oven.  My biscuits did not fill the entire bottom of the pan, so when I sprinkled the cheese, most of it hit the bottom of the pan and started to sizzle.  Quickly I removed the biscuits from the skillet to a cooling rack and continued sprinkling.

Then I realized- the parmesan cheese that had melted in the skillet had been transformed into delicious little parmesan crackers.

DSC03011

I had eaten most of them before I remembered to take a picture

What I mean to say is, sprinkle the parmesan in the pan if you want crisp little parmesan crackers, or remove the biscuits to a cooling rack if you don’t.  It’s up to you.  And, as I predicted, these biscuits did not last past breakfast 🙂

The Science Behind… mashed potato bread and experimenting with starch gelatinization

DSC02897

I imagine some of you are sick by now of my mentioning how I messed up a recipe by scalding the flour, thereby creating a bread with a completely different texture than usual.

The mistake opened up a whole new world for me of creating breads that were soft and light without using any fat!

After a little research, I learned that by adding boiling hot water to flour, I had gelatinized the starches in the flour.  This caused the sugar molecules to rapidly absorb the water, then burst- resulting in a gelatin-like consistency that resisted the strong net of gluten formation.

But scalded flour isn’t the only way to get the benefits of starch in your bread.  Mashed potatoes, or water from cooking potatoes or rice also have starch, and is a great way to use up a waste product that you might otherwise have thrown away!

DSC02847

In this post, I will discuss:

  1. What is starch?
  2. What does starch do in bread?
  3. How can I add starch to a recipe?

Here we go!

  1. What is starch?   Starches are complex carbohydrates (sugars) which occur in wheat and many other plants that rely on photosynthesis. Any sugars that are not used by the plant for energy are stored up in polysaccaride chains.  The starch is stored in the endosperm part of the plant.

grainparts_300x338_wgc

Long ago, people discovered that different plant starches were useful for thickening all kinds of dishes.  Each has its own unique characteristics and are useful for different preparations.  Some examples of starches we commonly use today are cornstarch, arrowroot starch, cassava/tapioca starch, and flour.

2. What does starch do to bread?  When we talk about this, we need to distinguish between wheat starch and potato (or other) kinds of starch.

According to the website The Science of Bread Making, “Studies have shown that wheat starch is very unique and compared to other starches (rice, potato, corn) contributes desirable characteristics to bread.It does not disintegrate at high temperatures like other starches, but remains flexible during gelatinization so that the bread can spring up in the oven. During baking wheat starch absorbs more water, taking enough water away from the gluten strands to make them rigid so that the loaf of bread will stand firm without collapsing when removed from the oven. (Pyler, 1988).

Unlike wheat starch, most other starches have low or no gluten.  So they add softness from gelatinization without also adding a rubbery, rigid texture from extra gluten.

DSC02855

3. How can I add starch to a recipe?

Since the focus of this post is on mashed potatoes, I’ll use potatoes as an example.  Potatoes are about 75% water, however, once they are cooked they are unlikely to absorb any more water (they might even give off some of their water!).  Try adding up to 1/5 of the total weight of flour as mashed potatoes without making any other changes.

DSC02871[1]

Potato water can be used anywhere you would otherwise use water.   If you decide to add dried potato flakes, you will want to account for any additional absorption they will do.  Test them out and see if you need to add any additional water.

So, that’s it!  Starch and gelatinization in a nutshell.  If you have any other questions, please let me know in the comments.

DSC02882[1]

Sources:

http://www.thescienceofbreadmaking.com/carbohydrates.html

http://joepastry.com/2011/on-the-many-uses-of-gelatinized-starch/

http://joepastry.com/2013/a-starch-is-a-starch/